Do you know you can forge an axe in your blacksmithing closet in a few easy steps? Now, it’s time to harness the opportunity to make your axe.
An axe is a powerful tool that has a lot of functionalities. It is one of the primitive tools invented by early men. It is useful in carrying out a lot of tasks, including the cutting of trees and logs.
Considering the level of its importance, we can say forging axes is one of the essential blacksmithing processes. The process might seem hard if you don’t know the right steps to follow.
Here are easy and practical steps to follow if you intend to forge your axe.
Essentials
The essential materials for the forging process of an axe include;
Instructions on How to Forge an Axe
Step 1: Get Your Material
The first step is getting your tools and materials ready. This process will ease further steps and make them smooth. However, the material for forging axes might vary with specific designs.
Different designs have different processes. The folding design is the most general method, and it is relatively more comfortable than the rest. For an average-sized axe, you need 11 inches long and 2 inches wide of mild steel.
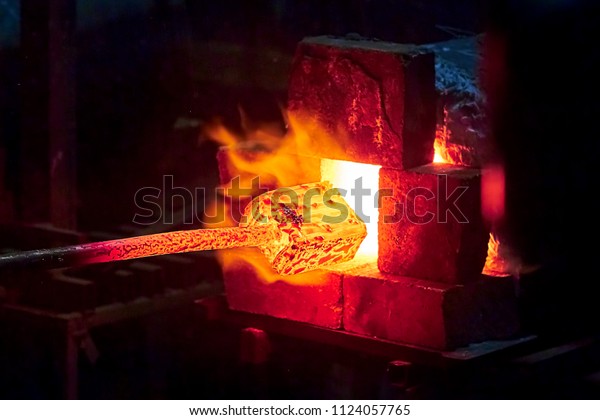
Step 2: Heating
The heating process of an axe is one of the critical steps. You need to be precise about the temperature you are working with for the project. The best forging temperature for steel is around 1200℃.
Heat the metal to a forgeable temperature. The flame for forging steel should be yellowish red. If you have experience with forging, then you can judge how hot or cold with its color.
Pro Tip
If not, you can get a thermometer to measure the temperature. It is essential to be careful with the forging temperature. Overheating can ruin the steel, and if not properly heated, it will be challenging to work on it.
Keep turning and flipping the metal at intervals to ensure the even dispersion of heat. Also, remember that you have to keep the temperature constant throughout the hammering process.
Step 3: Bending/Folding
Once you steel attain the suitable temperature, remove it from the forge. Begin the bending/folding almost immediately before the steel loses its malleability. Bend it around the drift.
You can try to make the edge of the metal even. But don’t beat yourself too hard if you don’t get an ideally uniform end. There are, however, some things to ensure before closing the ends.
Quick Steps
- Insert a slab of high carbon steel in between the two layers.
- Also, add a bunch of borax between the two layers.
- You can decide two or three holes through the three layers and insert a steel rod, but it is not compulsory. This insertion aims to increase the quality of the axe and hold the sheets firmly in place.
Step 4: Reheating
By the time you are through with the folding and insertion when forging a axe, you would have to reinforce the heat.
Quick Steps
- Remove the metal from the forge if you have achieved a suitable temperature.
- Sprinkle more borax and hammer the layers together with massive strikes.
- Hammer both sides by flipping back and forth while landing massive blows.
- It is crucial to maintain the temperature all through this hammering process.
- The process is long, and it might require a series of reheating.
- Continue the hammering process until the three layers become one.
There is no need to panic if you notice any deformity in the eye of the axe during the hammering process. All you have to do is to reinsert the drift after hammering. This process will subsequently restore the eye shape of the shaft.

Step 5: Hammering
This step is a continuation of step 4 above. Once the three layers become one, you can keep hammering the axe head to smoothen the shape. You can leave the drift inserted to help you maintain the shape of the eye.
Step 6: Sharpening
This step also requires patience and plenty of reheating. Don’t worry about having a perfect axe head yet. Just thin out the edge of the axe. You will carry out the imperfect sharpening with the use of hand and bench tools.
Step 7: Hardening and Tempering
This step aims to ensure that the axe head is neither too hard nor too soft. It will also prevent fracturing, chipping, while also ensuring edge retention. To harden the axe head:
Quick Steps
- Heat the edge of the axe to about 800-900℃.
- Allow it to heat evenly but slowly by flipping it over at intervals.
- Stop the heating when you achieve an even red glow.
- Quench the steel in water.
After this process, you should have a brittle but hard axe head. Now, it is time for tempering.
- Heat the axe head at a temperature in the region of 230℃.
- Continue the process slow and steady for hours and allow it to cool slowly.
- You can quickly tell the difference between the hardened part and others. The hardened part appears darker than the rest.
Step 8: Finishing
You expect your axe to be a little ugly at this stage. Your finishing aims to fine-tune your work, insert the handle, and give it a perfect edge. This process is one of the steps in axe making where personal preference comes in.
Start by fine-tuning the axe head. Follow this process by applying an appropriate method to give the shaft a distinctive sharp edge. Use other and polishing process you deem suitable.
You can also use a wooden or metallic handle for your axe.
FAQs on How to Forge an Axe
Question
How long does it take to forge an axe?
Forging an axe does not take too much time. You can form a complete shaft within a day as long as all factors are favorable. You can do more than one within this period if your forge can take more than one head at a time.
Question
How can I measure temperature during the forging process?
Measuring temperature is quite comfortable for experienced blacksmiths, and they can quickly tell the temperature change from the color change of the steel. Beginners can, however, make use of a suitable thermometer to detect the temperature.
Question
Can I forge an axe at home?
Location is not a restriction to forging an axe. As long as you have enough space, the materials, and the essential tools, you are good to go with the forging process of a shaft.
Video
Warnings
You shouldn’t neglect some essential precautions while forging an axe. These precautions include
- Pay attention to temperature ranges while forging an axe to avoid ruining the steel.
- Remember to maintain the drifting eye while forging.
- Ensure that you are using a suitable forge to keep up with the temperature.
- Ensure that you use safety gear and other blacksmith’s safety precautions.