The war hammer is a long-handled weapon used by foot soldiers in medieval war. It was used by soldiers in defense of fortified walls and against mounted men-at-arms. It is an ancient weapon used by one of the ancient rulers of France before spreading to most other parts of Europe.
The war hammer is usually entirely made of metal with a shaft and a hammerhead. In some cases, the handle can be wooden but as strong as possible. The grip or handle of the hammer is generally longer than those of regular hammers. The hammerhead has a blunt end used for beating objects and a sharp end for puncturing. Sometimes, the hammerhead comes with two pointed ends.
The war hammer can have an overall length of 5 to 6 feet and come as short as 2 to 3 feet. Warriors use long hammers against horse riders while using shorter ones from horsebacks or in close quarters. The war hammer is a good weapon of war that helped many win their battle.
The war hammer was useful during these wars as its sharp edge could penetrate enemies’ plate armor. The hammerhead could also break and shatter enemies’ bones and joints. It was one of the numerous weapons used during wars.
How about forging a war hammer for yourself? Does it seem like something you’ve longed for to improve your blacksmithing skills? Let’s check it out. If you want to develop yourself a war hammer, then below is an easy guide to help you accomplish that.
Essentials
Like every other forging process, forging a war hammer requires you to get the essential tools and materials needed. Having these essentials available will ensure you a good forging process. Here are for making war hammer;
- Forge
- Anvil
- Angle grinder
- Hammer
- Quenching oil
- Sanders
- Steel
- Wheel cutter
- Chisel
- Punch
- Wire brush
- Clamps
Instructions
STEP 1: Gather Your Materials
The first step to forging any instrument is gathering the essential materials. If you are an experienced blacksmith, you have a high chance of having most of the necessary tools. However, a critical material to look out for when forging war hammers is the billet.
The size of the billet should be proportional to the size of the hammerhead you intend to make. The thickness of the steel is crucial for this project as well. The thickness of the steel will ensure that you can carve out every part you need with ease. Also, you would need a wooden or metal rod to serve as a handle for the weapon.
STEP 2: Measure and Cut
There is a high probability that your steel or billet can be longer or shorter than necessary. Either way, the best way to confirm is by measuring the steel. Start by measuring the billet for the hammerhead and ensure it will be enough to forge the two faces of your war hammer.
Also, the same technique applies to the steel or wooden rod for making the handle. Measure your desired length and cut it out. It is essential to keep in mind that the handle of the war hammer must be proportional to the head for balanced weight. Likewise, the handle will determine the overall length of the war hammer.
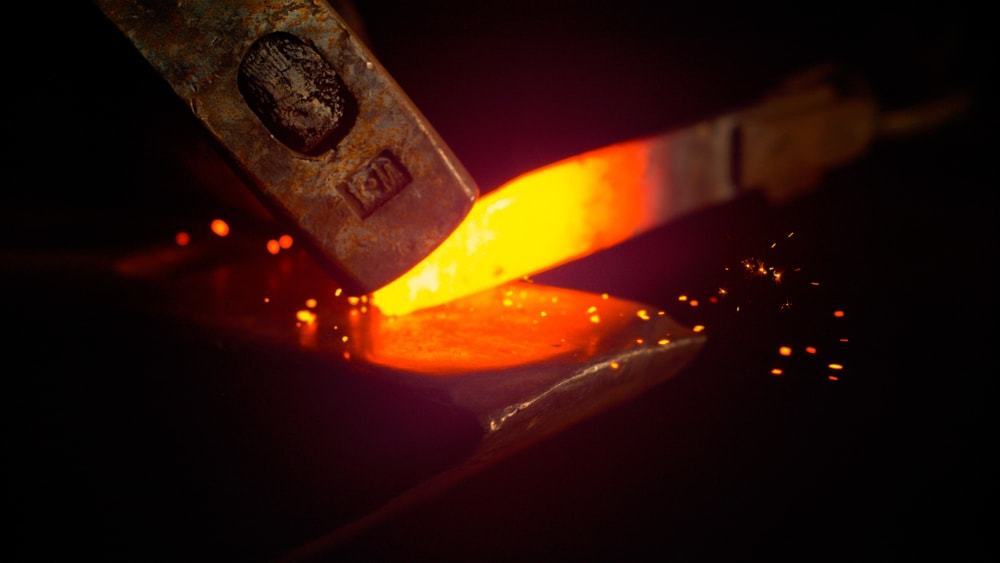
STEP 3: Heat the Billet
Now, it is time to apply some heat to your steel before carrying on with the forging process. Start by firing up the forge to a suitable temperature before carefully placing the steel with the tong.
Leave the steel in the forge until it becomes red-hot. This step is crucial to forging the war hammerhead without hassle. The higher the temperature of the steel, the easier it is to develop the weapon.
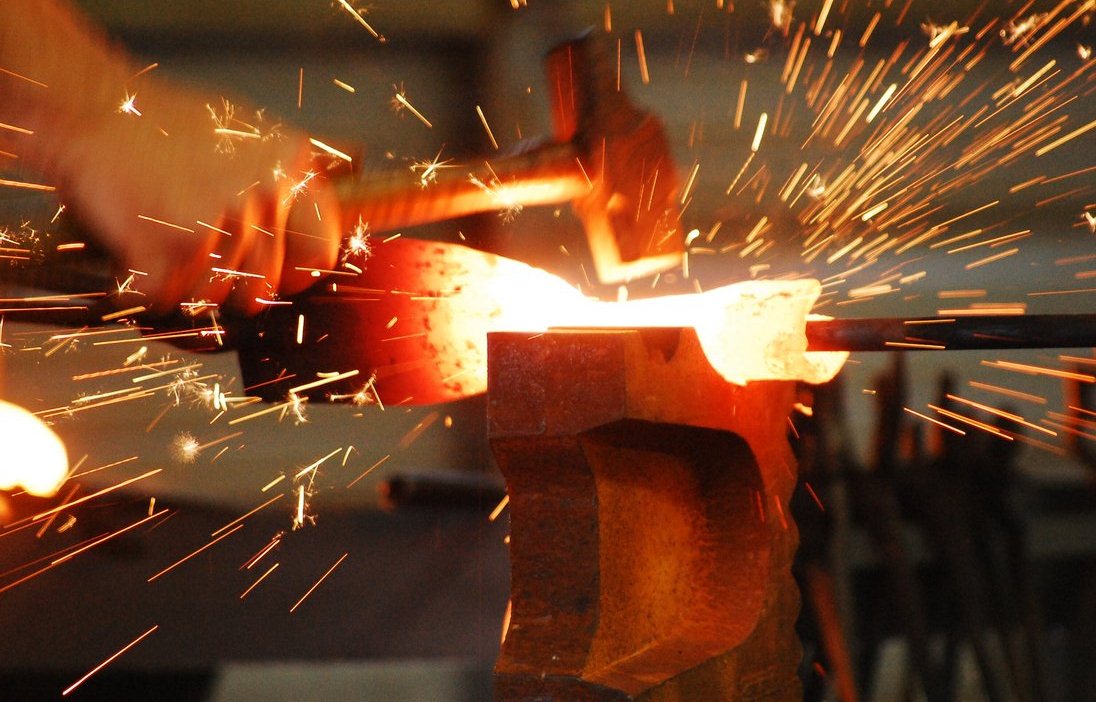
STEP 4: Beat and Bevel The Steel To Form The HammerHead
Beating ad beveling can only begin once you are sure that your steel has attained a forgeable temperature. In the case of war hammers, you would need to carve out two sides. The first side of a war hammer has a square end, while the other side has a pointed tip like an arrowhead.
- Hammer the billet until you have a uniform square.
- Mark the center of the steel.
- Mark out the center area where you intend to drift the hole.
- Beat each side to the billet to suit the shape you intend to create.
STEP 5: Drift the Hole
Drifting a hole in the middle of your war hammer requires careful technique. This drift in the center of the steel serves as a port for the hammer handle. You will need a chisel, punch, or any piercing and chopping instrument. It is best to go with any
Before you begin chopping off the center of the steel, you will have to heat the hammer head. Heating the steel will soften the metal for easy drill.
- Place the hammerhead into your forge and heat till it becomes red hot.
- Remove the red hot hammer head from the forge and place it on the anvil.
- Use the chisel or punch to drift a hole into the center of the hammerhead.
- Beat the chisel against the hammerhead with your hammer till the spot gets drifted completely when it moves through to the other end. You can turn the steel over and repeat the process on the same spot. This step is easier than drifting through the initial side.
- Rotate the hammerhead while you punch for the hole to ensure smooth sailing.
- Tender the edges of the hole to make it soft and easy to input the handle.
- Allow the steel hammer head to cool down while smoothening the hole with the wire brush or sanding paper.
Once the hole is created, you are few steps away from forging your war hammer.
Note: It is essential to ensure that the hole on the hammer head is big enough to fit in the handle.
STEP 6: Forge Your Shape
Forging the shape of your hammer head is highly essential as it is what defines your war hammer from other types of hammers. The shape of the war hammer head is similar to those of ordinary hammers, only that one of its ends is sharp while the other is blunt. The blunt end is used for beating objects, while the pointy end is for piercing and punching.
To form the shape of your war hammer head, you have to heat the billet. Forging steel while it is hot is more accessible than generating it while it is cold. Heat the steel billet to a red hot stage before removing it from the forge.
- Place the hot steel billet on the anvil and start beating it with your hammer to form a precise shape.
- When beating the billet, you should concentrate more on the pointed end while gently hitting the blunt end. The abrupt end needs to maintain its shape, while the pointy end needs to get as sharp as it can be.
- You can also reheat the steel billet by placing it in the forge. Reheating the steel billet will make it easy to forge the shape of the hammer.
- Place the reheated still billet on the anvil and keep beating till you get your desired shape. While hitting the metal, You should rotate at intervals to create an even and smooth forged hammer.
You can also use a chisel to shape the steel billet, but you need to be careful so you won’t chop off more than you need. Maintain the shape of your hammer head when forging the body. It is crucial to focus on having an almost perfect shape at this point. Feel free to reheat the steel as many times as need for a smooth drill.
STEP 7: Smoothen the Billet
This step determines the appearance of your steel billet after forging the shape. After stamping the form of your billet, you will have a rough figure of your hammer head. It would be best if you smoothened the steel hammer head to give it a good appearance.
To smoothen the billet, you will need to use your wire brush to even the rough surfaces. It would be best to do this while the steel is hot to make the process easier and faster. Ensure you do not use plastic or rubber brushes to smoothen the billet, as it will melt the moment it touches the hot billet.
You can also make use of sanding paper to smoothen the billet. Angle grinders will also perform the job but can be a little bit too intense, so you have to be careful while using them. Angle grinders will also not get into the holes of the hammer head, so wire brush and sanding papers are the best bet.
Regardless of the technique that you intend to use, ensure that you have a smooth surface as much as possible.
STEP 8: Reheat and Quench the Hammer Head
After smoothening the hammer head, you have to make sure you increase the strength and toughness. The process is known as annealing. Annealing your hammer head will make it stronger and withstand several blows.
To anneal the hammer, you will need to place the hammer in the forge and heat it. When the hammer head becomes red hot, please remove it from the forge and quench it in a quench liquid. You can make use of water or oil to satisfy it.
You can also quench the hammer head in ash or sand. Allow the hammer head to cool off steadily. When it cools off completely, you should remove it from the quench liquid and prepare it for the next step.
STEP 9: Join the Handle
After the hammer head gives you a perfect form, you can now add the handle to it. It is best to pay attention to the length and strength of the handle. The handle should be long enough to carry the balanced weight of the head. It should also be strong enough to withstand all the rigor of using a war hammer.
- Insert the stem into the drifted hole in the forged billet. The grip you create should be large enough to fit the hole in the billet. The gap should not be larger or smaller than the handle.
- You can use wire to fasten the handle for improved tightness. Alternatively, you can use a simple welding technique to hold the handle with the head if they are both made of steel.
After joining the handle to the billet, you have successfully forged yourself a war hammer. Congratulations on your success.

Frequently Asked Questions
Are War hammers real?
War hammers are genuine as they were used in the medieval war. They were used to get around the enemies’ plate armor. War hammers are pretty different from other hammers, but they come as a handy weapon during the medieval war, which makes them accurate than ever. These weapons are still in existence to date.
Did Vikings use war hammers?
Vikings used war hammers as a weapon of war. It includes their vast array of weapons used in fighting battles. Although evidence that Vikings used war hammers as weapons is quite negligible, they used them as one of their weapons. The war hammer helps Vikings penetrate the enemies’ plate armor.
How heavy is a war hammer?
The war hammer weighs about 10 to 30lbs depending on the density of its material. The weapon usually has an overall length of 5 to 6 feet, making it quite handy and a bit heavy. It is one of the Viking’s weapons with an average overall length. The weight of the hammer also allows it to be a good weapon choice for battle.
In battle, it is easy to wield the war hammer as it is of average weight. It also makes it easy to attack plated and mounted men-in-war. Some Viking warriors search for war hammers during combat to find a better weapon than a sword.
Is a hammer a good weapon?
The hammer is a good weapon of combat. It can serve as a defensive and attacking weapon in battle and can be used to break through enemies’ plate armor. There are different types of hammers you can use in combat, and the most suitable one for the battle is the war hammer.
The war hammer is a standard weapon of battle in the middle ages. It pierces through enemy iron armor and deals heavy blows against the enemies. It was also a replacement weapon for the sword. The war hammer is a good weapon as most iron armor could not withstand it.
Video: https://www.youtube.com/watch?v=bPEQymwRsmE
Warning and Precautions
Forging a weapon, including war hammers, requires proper care and due precautions. These precautions will not only help you to achieve desired results, but they will also ensure your safety and wellness all through the process. Some of the notable precautions and warnings while forging a war hammer include;
- Assume every metal is hot through the process of forging your war hammer to avoid burn
- Use all necessary blacksmithing protective materials all through the process. Some of the notable protective materials include gloves, apron, protective glasses, and ear covers.
- Ensure that all tools and materials are in perfect condition before use
- Only lay your hands on tools that you are familiar with, and you can operate
- Avoid rubbing your hands on the edge of your sword after the first sharpening stage to avoid accidental cuts
- Keep all forging precautionary measures in mind all through the process
