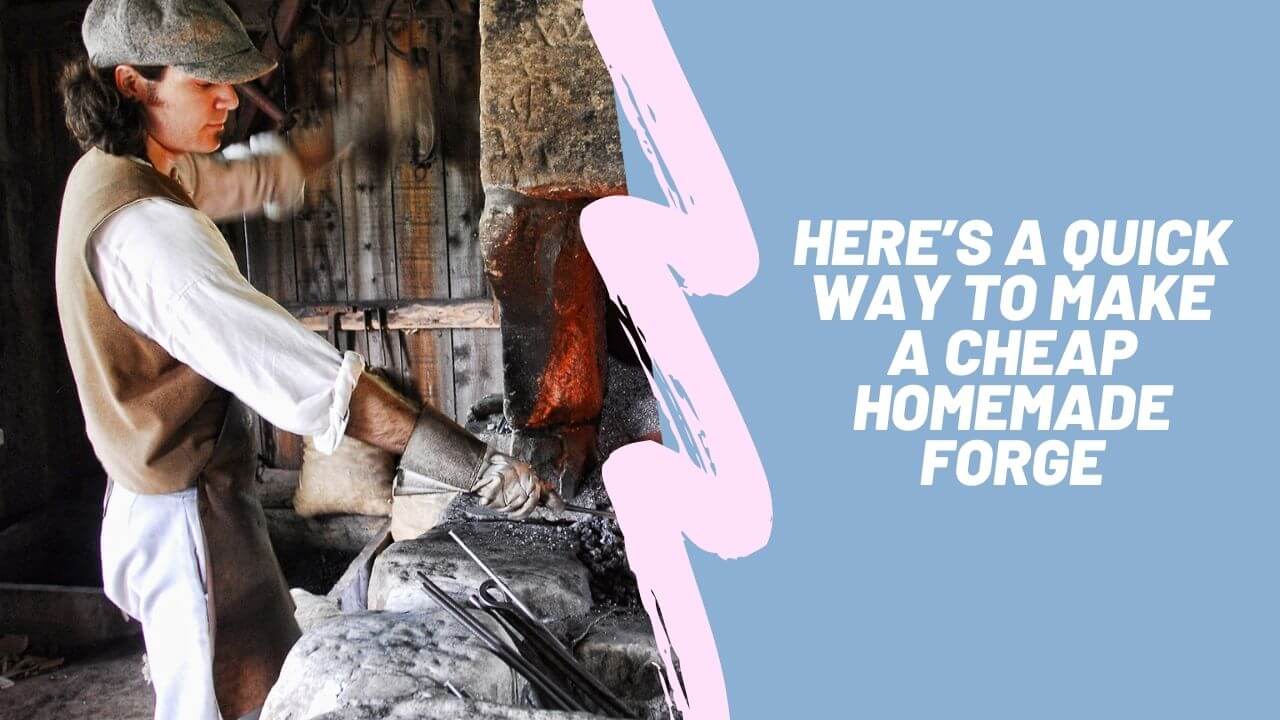
When there is a need to hold fire and force air to increase heat generation for blacksmithing processes, a forge is the best option to consider. The forge is used to heat steel (either to shape the steel or heat-treat it). In the past, an homemade forge is coal-powered fire pits with sufficient oxygen to increase temperature.
A DIY forge is a type of hearth or where the fireplace is located. This hearth is also useful in heating metals. Heat on metal makes them easy to beat into shapes and increases the hardness of the metal. Getting a metal to a workable temperature is the main function of a forge.
The forge consists primarily of a pit where fuels burn to produce heat. It also has a place where the metal is exposed to high temperatures. The place where you create the fire is called the hearth.
A pipe is needed to force air to keep the fire burning. This pipe is called the Tuyere. The bellow or blower is also useful to force air to keep the fire kindling. One of the qualities of a good forge is that it must have a proper ventilation to maintain efficient circulation to keep the heat burning.
Centuries ago, the forge was powered by either coal, charcoal, or coke. These fuels burn to produce heat that would bring metals to their malleable state. Over time, the fuel used in powering the forge has varied, but the design of the forge has remained the same.
Nowadays, people have found a way to achieve the same results using electricity or gas. If you are looking for something cheap, easy to operate, and usable for basic forging jobs, try an homemade forge.
Do you wish to know how to make a cheap forge?
The good news is that you can easily learn how to build a cheap forge and this guide will provide you with all that you need to know.
Here are steps that can guide you on how to build a cheap homemade forge:
Essentials
Instructions to make an homemade forge
Step 1: Gather the Parts
You can either buy these parts or find them. If you are on a meager budget, it’s best to find them, which will not be so difficult to do. Give yourself ample time to find everything you need.
Finding any part isn’t what is required of you but finding the perfect piece for the job. Gathering the components of a forge is an easy task, but it demands expertise and experience.
In this case, the two essential parts you need to get for making a DIY homemade gas forge are firebricks and burner. Other parts can be improvised.
Step 2: Build the Forge Body
Building the homemade forge is a straightforward process but involves some critical steps. These steps include combining all the other parts. Connecting the pieces in the right way requires professionalism. Having prior knowledge on forge makes it easy to combine and set the forge the way it should be.
Quick Steps
- Get firebricks of suitable thickness.
- Cut the firebricks into two rectangular shapes of equal sizes. Each brick will form a face of the forge.
- Cut rectangular templates that will form the cavity of the forge and trace it out on the firebricks.
- Use hammer and chisel to cut out the cavity in the firebricks. Note that this cavity will form the space of your forge and its size is usually dependent on the thickness of the brick.
- Take your time to chisel properly and carefully. Although it is not compulsory to have a perfect cavity, all you need is near half a circle on each brick that give enough space.
Note: If you are using a container in place of firebricks, you will need an insulator. Using an effective and durable insulator reduce energy lost to the environment. The type of insulation you use is also a very dependent factor.
It is crucial because resources (fuel) put into the forge will only make use of their full potentials if you reduce the rate of heat loss, and that will be the work of an excellent insulator. However, you can still use some homemade forge insulation methods.
Depending on your budget, you have two options: fire bricks or high-temperature ceramic fiber blanketing.
The two options include:
- Firebricks are relatively common. You can get them at a low price, but they do not have much sustainability and durability value. They will end up frustrating you.
- Ceramic fiber blanketing has high heat retention capacity, sustainability, and durability compared to firebricks. They are a product of rigorous steps, thus making them relatively expensive.
Picking between these two is dependent on the factors surrounding the situation at the moment. Regardless of your selected choice, layer the interior body of the forge with it.
Step 3: Drilling
Drilling is another crucial step when making an homemade forge. The drill should help you focus the heat from the burner to the center of the forge. It will serve as the inlet hole that allows you to supply the desired amount of heat.
Quick Steps
- Mark the center of the firebrick where you want to make the drill and start drilling appropriately
- Keep drilling until you have an almost perfect inlet hole
Step 4: Set up the burners
The use of heaters is not a big problem here. You can use as much heater as you like. The essence of burners is to heat the metals or substance in the forge. The number of burners supplying power to the forge is the determinant of the temperature limit at different times.
In this case, you need a burner that will fit into the air inlet and supply gas directly to the center of the forge. You can use a single or double burner, depending on the size of the hole and number of drills.
Using just one burner will take much time to enter about 20000℃, but when you use two burners, it will take a lower time. This logic also applies to the subsequent number of burners.
Pro Tip
Since budget is a considerable factor, you can build a smaller forge using a propane bottle torch. The more sophisticated your burner set up plan is, the more expensive it is to accomplish it.
Step 5: Finishing Touches
The finishing touches will help you to perfect your building process. Start by crafting a way to keep your homemade forge together and avoid cracking. As long as you fasten the brick together properly, it won’t come apart even if it cracks over time.
Quick Steps
- Add two thinner firebricks to improve insulation.
- One of the thin bricks will be at the top while the other one will be below.
- Use wire to fasten them together. Steel wires are usually the best. You can use about 6-10 ties across the width and the minimum of two ties across its length.
- Fasten them hard enough to keep them together, even in case of cracks.
- You can include a stand to keep the torch in an upright position.
- Ensure that the propane hose is covered properly to prevent accidental burn.
Step 6: Make your Ventilation
Ventilation is also a crucial step to take note of. Ventilation is vital both to the forge and to the blacksmith. There are two types of ventilation to take note of when making your forge.
The first one is for the benefit of the forge while the other is for the benefit of the blacksmith. Ventilation should be made in the forge in order not to choke the fire.
There should be enough air in the forge to keep the fire burning. Fire needs oxygen to prevent burning, so the air supply must be kept in check through the appropriate ventilation.
The other type of ventilation is the ventilation in the room. Burning includes complete and incomplete combustion. The latter results in carbon monoxide, while the former results in carbon dioxide.
Carbon monoxide is a very harmful gas as it can kill an adult within 2 minutes. So, the ventilation in the room should be considered necessary as well as the ventilation of the forge.
You can go ahead and test your forge! Take it outside first, and always think about ventilation.
FAQs about homemade forge
Question
What are the major types of forges?
There are different types of forges. Forge types are dependent on the fuel used in powering them and other factors. Different forge types have their benefit over other forges. They also have their disadvantages. The following are the types of forges.
Gas forge
Gas forge makes use of gas as fuel to produce heat. The gas could be either natural gas or propane gas.
There are various gas forge designs, but blacksmiths use the most efficient and commonest design. The forge makes use of a cylindrical forge chamber and a burner tube connected to the body.
It has a lining of insulating material to control the amount of heat that escapes the forge. Your choice of insulator can be a hard castable refractory ceramic or a soft ceramic thermal blanket.
With either of the insulating material used, the gas forge has a low tendency of losing heat to the environment. This ability is because it confines all its temperature within the forge making its heat efficiency perfect. Gas forge also makes it easy for you to have the necessary control over the amount of heat and pressure. You can increase and decrease it as you desire.
A gas forge is of different sizes. Their sizes range from large forges that utilize big burners to small sized forges that use low heaters. There can be a gas forge as little as the size of a brick. This portability is one of its advantages over other forge types.
Charcoal/Coal forge
This type of forge makes use of allotropes of carbon as fuel. The fuel type used in this forge include coke, charcoal, and coal. These fuels usually burn to produce fire and heat.
Despite the varying fuel used to power this forge, their design has always been the same. The only variable feature is the size of the forge and this doesn’t occur due to fuel type variation but its capacity to allow large sized metals.
The design of this type of forge is a hearth structured in a way that allow metals to be placed in it to heat it to a particular malleable state. A hearth is a non-combustible material that can be the floor of a fireplace or the body of a forge.
The dwelling is made of stone, brick, ceramic, and sometimes metals. And these metals used in making forges usually have a high melting point or can retain a large amount of heat. The metals that can be used to make hearth are relatively rare.
Question
What are the factors that determine the design of coal forges?
The design of DIY coal forges is based on three factors which are; the fuel’s volume, fire shape, and the amount of air.
The amount of air that aerates the homemade forge is significant in the design of this forge. It is vital for the fuel to continuously burn to produce the needed heat. The fuel requires sufficient oxygen to maintain heat delivery, so forge ventilation is very essential; otherwise, the fire will die-off, consequently leading to heat production stoppage.
Another determinant of your forge’s design is the volume of fuel. The amount of fuel the forge can accommodate must be included in the design. The larger the volume of fuel that the forge can accommodate, the larger the forge will be. And the more significant the forge, the more effective it will be. Large sized forges can accommodate metals of different sizes and shapes, thereby increasing their versatility.
The shape of the fire of a forge determines the type of metals that can be worked on in the forge and the form of the fire must be designed in such a way that it can accommodate different shapes of metals. The forge’s capacity to accommodate metals of different shapes makes it a good choice for blacksmiths.
Question
What are the advantages of a coal forge?
The advantages of using a coal forge are;
· Coal forge can accommodate different sizes of metal.
· Coal forge can produce localized heat.
· It is easier to forge weld using a coal forge compared to a gas forge.
· Compared to propane forge, coal forge has less scaling. This is an additional advantage of coal forge over the gas forge.
· Coal homemade forge doesn’t emit much heat to your workshop. It adds less warmth to the shop, as compared to a gas forge. Its temperature is mostly directed to the metals, and only little heats escape to the environment
Question
What are the limitations of using a coal forge?
The limitations of using a coal forge are;
· When making use of coal forge, it takes a longer time and stress to keep the fire burning.
· Coal forge is not easy to control and can burn your work if you are not very careful.
· Coal produces soot. The shop, work, metal, and everything in the vicinity tend to be very dirty and dingy.
· Obtaining the fuel used to power coal forge can be very difficult.
· Coal forge fuels (coke, charcoal, coke) use up large storage space.
· There is a danger of fire outbreak since the fire used is open.
· Unlike gas forge, it is challenging to work on several small pieces of metals in the fire at the same time.
Question
What are the Advantages of a gas forge?
Choosing a gas forge has its own advantages, which are;
· Gas forge can be used indoor without making use of a chimney. Gas forge barely produces soot, so the need for a fireplace is negligible.
· The fuel used to power a gas forge is readily available.
· A gas forge is portable; thus, it is a very easy forge to handle.
· Gas forge does not make use of coal; therefore, the space for fuel is not needed, saving space and material for other purposes.
· The use of gas forge is very convenient and easy.
· It helps to keep the workshop warm in times of cold.
· It can be automated in a way that your work does not burn up in your absence or presence.
· A gas forge is spacious enough to allow you to work on different pieces of metal at the same time. This gives an added advantage when making small items in large quantity.
· It is swift to use. It can heat up and be ready to forge in less than 5 minutes.
Question
What are the limitations of using a gas forge?
The disadvantages of using a gas forge are;
· When making use of the gas forge, it is challenging to carry out forge welding.
· Gas forge poses a significant risk of carbon monoxide to humans when used indoors.
· Gas homemade forge adds heat to the shop, making its temperature useful only during cold times. Its temperature is most unbearable during hot days.
· Purchasing gas forge is very expensive. Only if you build it yourself would it be a little bit cheaper.
· Making use of localized heat is impossible. This fact is because when making use of the gas forge, the whole place gets heated up.
· The size is limited. It is inextensible unlike coal forge, and it can only accommodate pieces of metals of its size and shape.
· It has more scaling compared to a coal forge.
Question
How much does it cost to build a forge?
The cost of building a forge varies depending on how you want the forge to look. Sophisticated and professional forges require high-quality material, causing them to be more expensive than other forges with little or no sophistication or professional use. Building a cheap forge can cost as low as about $50, at mid-range of about $400, and a high price of over $1000.
Question
What is the best forge for knife making?
You can use several forges in blacksmithing, but what you intend to create determines the type of forge that will give the best result. If you need a clean, soot-free result, you should go for the propane forge. The coal forge is suitable for heating small pieces, while larger pieces should go into the propane forge.
The propane forge is also easier to control than the coal forge. Sizes and shapes of the knife determine what type of forge you will use. I would recommend the propane forge for your knife making.
Question
What is the hottest forge?
During blacksmithing, there are times where you will need to make use of a very hot forge and times where you will need a moderately hot forge. The propane forge is the hottest type of forge, sweeping past the coal forge with so many degrees Fahrenheit. The propane forge can get as hot as 2300 degrees Fahrenheit, making it suitable for large-scale manufacturing uses.
Question
What is the best metal to forge?
There are several metals you can forge, but you should go for the best. The best metal to forge is steel as it is relatively easy to get; it is highly malleable and resistant to heat and corrosion. Different types of steel you can use range from alloy steel, carbon steel, stainless steel, nickel steel, tool steel, etc. Make sure you make a good choice of steel to forge.
Question
What is the best forge for beginners?
Beginners in the blacksmith profession might find it difficult to use some forge for their blacksmithing processes. Although the coal forge is a great forge for blacksmiths, it might pose a lot of difficulty for users, especially beginners.
The propane forge provides easier usage for beginners making it an appropriate type of forge. The forge is very easy to control and provides the needed heat ranging from low to very high. It might cost more to get, but it sure does provide top-notch efficiency and performance.
Question
Which metal cannot be forged?
There are several metals for blacksmithing with cast iron exempted because you cannot easily forge it. Cast iron is any metal that contains over 2% carbon content. This type of metal is quite brittle, easily cast, and you cannot easily forge it, so blacksmiths do not use it for their blacksmithing jobs.
Question
What is the hardest metal to forge?
You can forge several metals, but some metals are hard beyond forging that they will require a large amount of heat. One of the metals is chromium, which some people refer to as the hardest metal in blacksmithing. Titanium is also a very strong metal with a tensile strength of about 63,000 PSI, making it a very hard forging substance.
Question
Can I become a blacksmith without a forge?
Of course, you can become a blacksmith without a homemade forge, but it is a highly significant tool of a blacksmith. The forge helps in providing heat to make metals more malleable for forging. Without this tool, you won’t be able to heat metal before forging, which is a lot easier.
You can perform other blacksmith activities without heating your metals, which is why you can become a blacksmith without a forge. But it is advisable to get a forge for your blacksmithing processes.
Question
Should I buy a gas forge or a charcoal forge?
The forge to buy depends on what you want to use it for and your budget. A gas forge is suitable for large metals and a high amount of it, while the charcoal forge is suitable for smaller metals and low heat. The gas forge is also very easy to control; unlike the charcoal forge that is quite difficult to manage.
The gas forge offers neat and soot-free heating, while the charcoal forge can be a bit messy. A gas forge can be difficult to use during summer as it heats the room, which does not apply to.
Video on making an homemade forge
Warning and Precautions
There are certain precautionary measures you should keep in mind while learning how to build a homemade forge. These precautions and warnings are not just to make a great forge; it will also ensure your safety.
- Ensure proper ventilation of both the forge and your blacksmith workshop.
- Only use materials that can withstand the heat in a forge.
- Be cautious about your safety. Remember to wear safety glasses, gloves, and dust masks, especially while chiseling.
- Always chisel in an angle that keeps the chip away from you.
- Keep other basic blacksmiths’ safety measures in mind while building your forge.
Conclusion
When it comes to getting metals to malleable temperatures, a forge is the best place to achieve this. You can make your forge yourself. Building a homemade forge involves you to following specific steps. These steps include collection of the needed parts, creation of the forge’s body, forge burner setup, and finally, setting up a conducive ventilation system.
Building your forge is cheaper than buying a forge. How to build a forge cheap is dependent on the available materials and your level of expertise. The amount of money it will cost you to develop your forge depends on forge type and size you plan on building.
Different forge types are available in the market today, each with its fuel type that produce the needed heat. Your choice of forge type depends on certain factors such fuel type, budget, and your project size. With the detailed steps listed in this guide, you can certainly build yourself the homemade forge you need to achieve your blacksmithing goals.