Blacksmithing is one of the oldest and most creative crafts. Aside from its reputation as a crucial craft, it also offers a standard source of income, especially with the right blacksmithing guide.
Many individuals are aspiring to become a blacksmith but do not know how to go about it. Another major challenge they face is finding the right answers to questions that will help them get started.
So, are you interested in taking up blacksmithing as a hobby, but you are unsure about where to get started? Are you aspiring to become a professional blacksmith?
It’s absolutely OK if you don’t know the perfect point to pick it up. There is no need to be shy because you are not alone.
So, let’s dive into how to start blacksmithing and blacksmithing tips for beginners!

Contents


CHAPTER 1:
Introduction to Blacksmithing
Blacksmithing is a trade with a rich history. Although there have been a lot of modern modifications, the trade has not lost its core value.
As an aspiring blacksmith, learning about the history and core values of the trade is as essential as learning about the skill itself. This basic knowledge will prepare you for the task ahead.
This chapter will expose you to what blacksmithing is and who you can call a blacksmith. Likewise, you will learn about some of blacksmithing basic history and how you can become a successful blacksmith

Brief Overview of the Blacksmith Guide
A lot of people around the world are interested in the blacksmithing craft for several reasons. Some love the creativity involved in the trade, some like the business’s history, while some choose it as a source of income.
However, it doesn’t matter why you want to learn how to get into blacksmithing or get started with the blacksmithing trade. All that matters is that you have developed an interest and prepare your mind to learn and master the skill.
Blacksmithing for beginners is not a craft that can be learned overnight. Like every other craft, you need to give it time, dedication, commitment, and constant practice and a proper blacksmithing guide.
On a lighter note, blacksmithing is a fun hobby to take up. Be careful because you can love it too much and decide to make it your career.
Once you have the basics that are the craft requirements and accurate blacksmithing guide, then getting started is not a problem. This guide will show you the basic things you need to know as a beginner blacksmith.
Now, let’s get straight to business. One of the first things you need to do before getting started with the blacksmithing business is mental preparation.
This fact is not meant to scare you off. However, you must expect a few challenges, despite how enjoyable the process can be.
We’ve outlined crucial tips and basics that will serve as a blacksmithing guide so that you don’t have to suffer from stress or worry. Initially, I would say, “Get started right away,” but then I realized that you most likely won’t be able to get started right away.
The level of urgency might even scare you off, but rest assured that if you have the patience required to be a blacksmith, you already have 50% of the work covered.
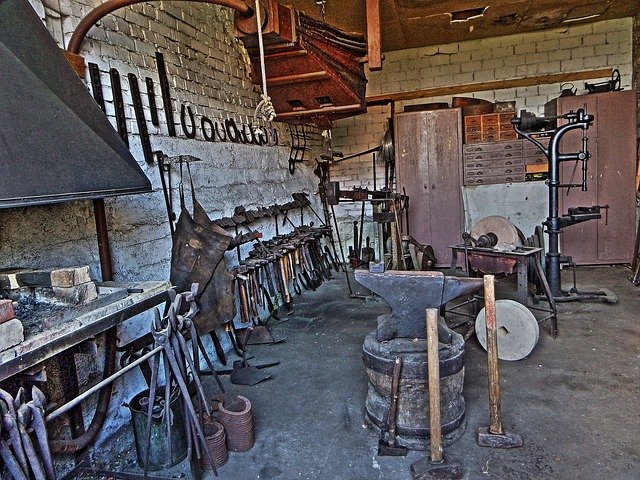
What Is Blacksmithing
Before you pursue your dream as a professional blacksmith, do you have a clear picture of blacksmithing? It is crucial to have a clear picture of the craft you wish to learn.
So what is blacksmithing?
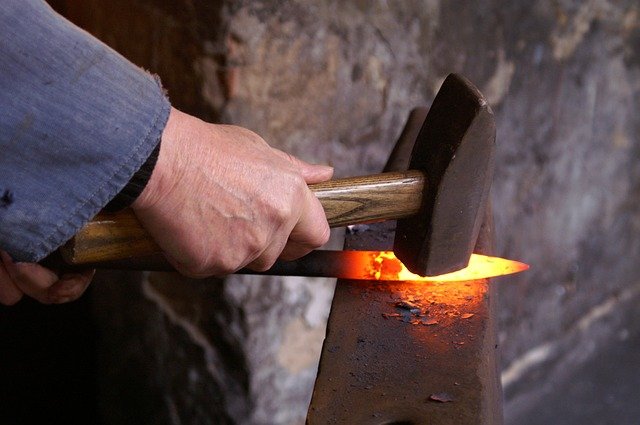
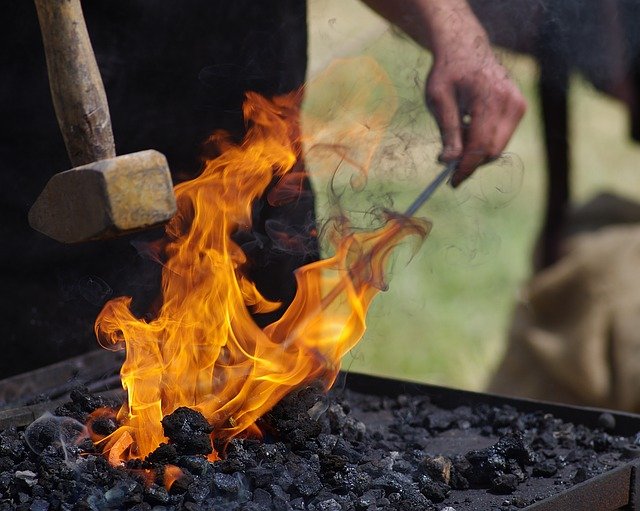
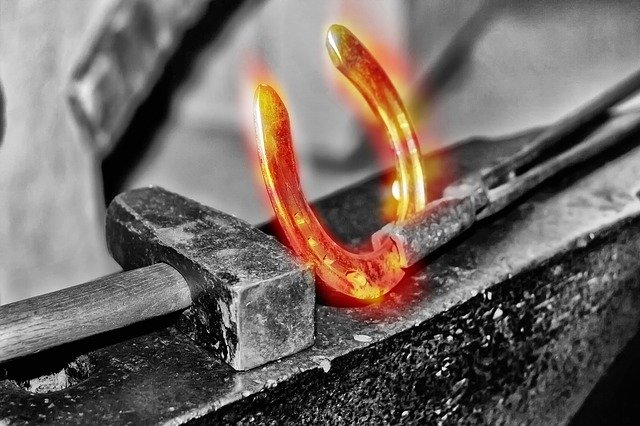
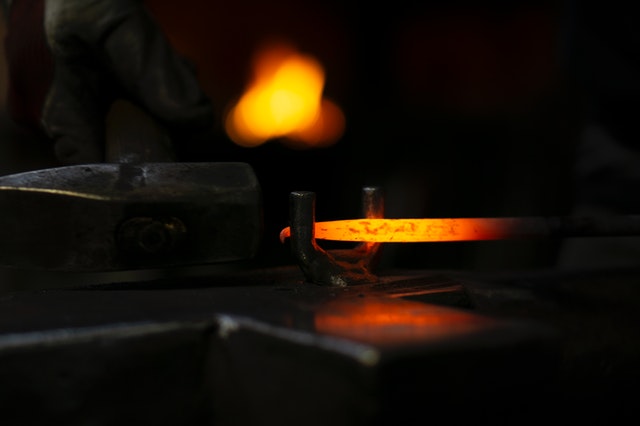
The name blacksmithing has a little fairy story to it. Iron is one of the major materials blacksmiths work on, and it gets black when heated, hence the name.
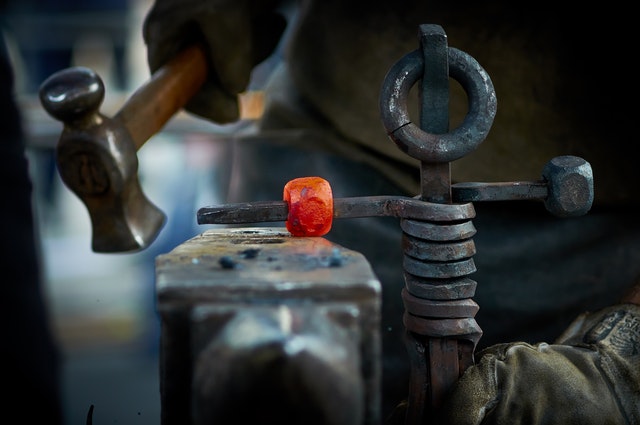
On a more professional term, blacksmithing is the art of making several materials with metals. It is the process of heating metals to a malleable point and beating them to the desired shape.
Blacksmithing involves getting creative with metals, using heat and different tools.
Who is a Blacksmith
Now that you know what blacksmithing is, the next thing is to figure out who exactly can be called a blacksmith. In brief, a blacksmith is someone who creates useful materials from metals using heat and tools.
Blacksmiths are also called smiths for short. They craft materials from metals; hence the name “blacksmith” from “black metals.”
Another interesting point is that you don’t have to be a full-time craftsman before being called a blacksmith. As long as someone passively or actively forge metals to make useful materials, you can still call such individual a blacksmith.
Now that you are aspiring to become a blacksmith, the moment you start making materials yourself, you can be regarded as a blacksmith. Let’s go into the full blacksmithing guide.
Brief History of Blacksmithing
Blacksmith is a craft with a rich history. Despite several core transitions and modifications, it is one of the early trades that did not lose its core value.
One can trace the history of blacksmithing back as early as 1500BC. The craft started with the discovery that heating metals to a particular point make them malleable.
This knowledge of blacksmithing first became popular among Hittites. This knowledge spread to other parts of the world when the Hittites scattered in 1200BC.
The development and advancement of blacksmithing did not happen overnight. It took time through several phases.
Ancient Blacksmithing
Ancient blacksmith includes the earliest form of blacksmithing. This period was marred with trial and error due to a lack of basic understanding of the craft.
The only common knowledge is that they can heat metals to a malleable point. Therefore, there were inconsistencies in blacksmithing practices around this time.
They started producing various weapons out of desperation and curiosity to hunt for food and survive. However, the weapons were of varying quality due to inconsistency in the pattern of forging.
Medieval Period
Blacksmithing became a clearer craft during this period. This period still retains a major part in the overall blacksmithing guide. It was considered to be one of the seven crucial mechanical arts.
The heating techniques became advanced, and the understanding of iron and other metals’ properties became clearer.
Consequently, they started making a lot of useful materials and were often highly regarded in the community. Blacksmith started holding reputable positions in the community.
But it was not all rosy for blacksmiths in some other area during this period. The craft was regarded as a skill of witchcraft, which gave blacksmiths a bad reputation.
Nevertheless, the medieval period marked a period of significant development in the blacksmithing trade.
Industrial Era
The industrial era triggered the integration of technology into the blacksmithing trade. The dominant period was in the mid-nineteenth century.
This period saw a massive shift from regular cultural blacksmithing to a more industrial craft. The industrial era witnessed a mass production of materials and commercialization of the craft.
Many people began to take blacksmithing as a full trade, and some diverted into automobile mechanics.
20th Century
The start of the 20th century saw various crafts development, and blacksmithing was not an exception. This period is the golden era of blacksmithing and many other crafts, although it saw a significant challenge.
The great depression period in 1930 pushed the craft to a point near extinction. However, many blacksmith works were preserved and still admired today.
Modern Resurgence
The modern resurgence of blacksmithing is what is still enjoyed today. The resurgence started in 1970 when blacksmith arts started capturing interests again.
Today, the craft’s popularity and creativity continue to grow and spread across several countries and regions worldwide
How to Become a Blacksmith
Becoming a blacksmith is not something that happens overnight. It takes time, hard work, and consistency. The first step is preparing your mind for the task ahead and giving it all it takes.
Coming across this guide is another great deal. The subsequent chapters of this blacksmithing guide will offer a complete breakdown of how to begin blacksmithing.
You will learn everything you need to know, including the basic blacksmith techniques, the essential tools, how to start forging, and setting up a blacksmith workshop. Also, these tips will help you learn how to start blacksmithing at home.
Therefore, prepare your mind that this guide will not only teach you how to become a blacksmith; it will guild you through becoming a successful blacksmith.
Summary
Blacksmith is one of the earliest crafts that preserve its core values till today. It has a rich history that evolved through the ancient, medieval, industrial, and modern eras.
If you aspire to become a successful blacksmith, you should learn about this history, who a blacksmith is, and what a blacksmith does. With this understanding, you can move on to learn how to become a successful blacksmith.
CHAPTER 2:
Essential Steps to Get Started With Blacksmithing (The Blacksmithing Guide)
As stated earlier, becoming a blacksmith is not a day’s job. It requires commitment and consistency.
Are you confused about the starting point of your blacksmithing trade? We share your worries.
The processes involved in starting blacksmithing as a trade are not enormous; neither are they too challenging. You will certainly mitigate the stress when you know the right steps to follow.
Below are some necessary steps that will help you get started with blacksmithing.

Be Mentally Prepared
Mental preparation is an essential step if you are aspiring to become a professional blacksmith. As much as learning blacksmithing basics can be fun, it is not a smooth ride.
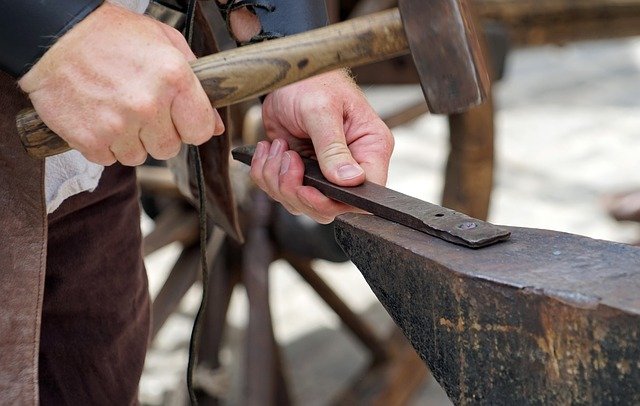
Not to scare you, but it is best to be prepared for the rigor and drill. Be ready to get used to the hit of the hammer and the furry of the fire.
This process often takes time and commitment. But your mental preparation will mitigate the possible hassle and help you get through the learning process faster than expected.
In summary, if you don’t want to get frustrated along the line, you need to be mentally prepared. This preparedness will take you through tough times in your blacksmithing guide. Nevertheless, this doesn’t change the fact that the learning process of blacksmithing is enjoyable.
Join Blacksmithing Websites, Forums, and Communities
This is one of the easiest and cheapest ways to get started with a blacksmithing guide. It is quite essential because it is the first thing that will give you a sense of belonging.
It is one of the best ways to meet people with similar passions around the world. This option also presents you with the opportunity to learn from people who have already been there.

You can also ask a series of questions on these online blacksmithing forums. Aside from the fact that you can get your questions answered by experienced blacksmiths, you can also meet beginners with the same challenges as you.
There are many blacksmithing websites with DIY ideas and how-to articles that will be very beneficial to you. The only thing you need to do is to search for them and join in.
However, be careful to join only reputable and trusted online forums and communities
Get Your Tools
Financially, this is one of the most challenging parts of getting started with the blacksmithing trade. If you have been practicing with someone else’s tools, you might find out that you will have minimal time to practice if the person still uses the tools.
Blacksmithing requires a lot of practice, and you will need tools. Having your own tools means you can practice at your pace, whenever you want.
Starting out as an apprentice in someone’s shop will still require you to practice when you are not there and you might need to recreate the projects you learned earlier. These tools makes it easier to follow the proper blacksmithing guide.
Don’t worry; you don’t need to buy every tool all at once. I have made an excellent compilation (in the latter part of this piece) of essential tools to get you started without breaking the bank.
If you don’t have the required funds to get a new set of tools, you can get some high-quality, used ones.
There are numerous blacksmithing tools, and if you can afford them, you might be tempted to buy every single one you find. But if you do this, you likely won’t use all of them.
However, if you only get the basic ones to start, you can decide to buy the other ones as time goes on. As you make progress in your blacksmithing journey, you can make your tools and build your forge.
But before then, stick to getting the essential tools. Save your money for a time when you need more specialized tools.
Register as an Apprentice
Although there are many blacksmithing processes you can learn on your own, it doesn’t change the fact that you need a master. Working as an apprentice will help you to gather enough practical knowledge about the trade.
There are several benefits attached to registering as an apprentice under a suitable master.
You will be able to gather enough practical knowledge and experience under the proper guidance of a master. Aside from the fact that it will aid your rapid development as a blacksmith, it will also ease the learning process and you will have someone to take you through the blacksmithing guide.
Oftentimes, your master can act as a mentor. You will even get to use your master’s workspace and tools before you finally get yours.
The process and terms of registering as an apprentice varies with location and the master you choose. It requires an official agreement of training time and a certain amount of commitment fees in some places.
In some other locations, it is not so formal. It only requires a casual agreement. The training period will also last until the master can certify that the apprentice is good enough to practice alone.
Whichever way works in your location, ensure that you get it done as soon as you are willing to start learning. It might be the first commitment you will make as an aspiring blacksmith
Choose a Mentor
Like every other career, choosing a mentor is equally valuable in the blacksmithing trade. If you register as an apprentice, you can choose your master as a mentor, but it is not compulsory.
A mentor will help you to explore your blacksmithing career options and set reasonable goals. He or she can also share with you his or her career path to greatness.

Aside from sharing this information, they also serve as motivation and provide mental and emotional support. Also, choosing a suitable mentor will help you to develop contacts and identify resources.
The mode and consideration of choosing a mentor are at your discretion. However, ensure that it is an individual that is high up on the ladder of the blacksmithing trade and take you through the blacksmithing guide.
Explore Online Options
The world is fast moving towards the digital age, and the solution to most of our problems is now online and waiting for exploration.
If you aspire to become a blacksmith, it is best to learn how to explore various online options. You can get to learn a lot of basic and practical steps even before handling a tool.
This blacksmithing guide you are reading right now is one of the many valuable resources available online. Most blacksmithing steps and processes are available online on various blogs and websites.
Also, there are a lot of YouTube videos with detailed and explanatory steps of various blacksmithing processes. You will find almost anything you intend to learn in various tutorial videos.
However, it is best to ensure that these online resources are from trusted and reputable sources. It is better if you know how to filter the information you get online.
Get A Workspace
Getting a workspace is similar to getting your tools. Don’t make the mistake of thinking you have to wait till you are fully professional before securing a workspace.
You will certainly need a place to practice by yourself while still learning. Likewise, you might need a place to secure your tools as well.
The workspace doesn’t have to be fully furnished or appear all professional. All you need is a space to practice by yourself and somewhere to kick your career after learning.
Summary
Like every other career and trade, building a blacksmithing career takes time and decisive steps. You can skip the hassle of finding a convenient point to start when you know the right steps to follow.
Once you are mentally prepared and make up your mind to learn the trade, start taking decisive steps to learn and follow the right blacksmithing guide.
There are several ways to learn, including registering as an apprentice, exploring various online resources, and getting basic self-practice tools. Don’t forget to choose a suitable mentor to make the process hassle-free further.
CHAPTER 3:
Basic Blacksmithing Tools
Like most other crafts, you cannot be a blacksmith without the right tools. Although it might not be easy to get all the tools at once, you should get them one at a time.
As you progress in the blacksmithing craft, you will get to learn how to forge various tools. Also, you can get fairly used tools if you cannot afford a new one.
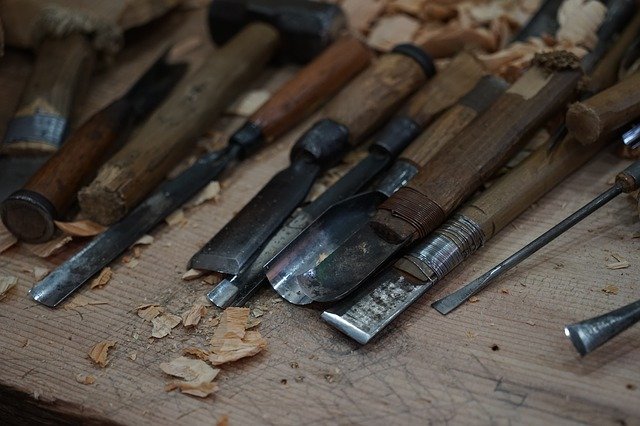
Below is an extensive list of must-have tools needed to get you on the right track. They are tools that you can get fairly cheap and are essential beginner blacksmith tools.
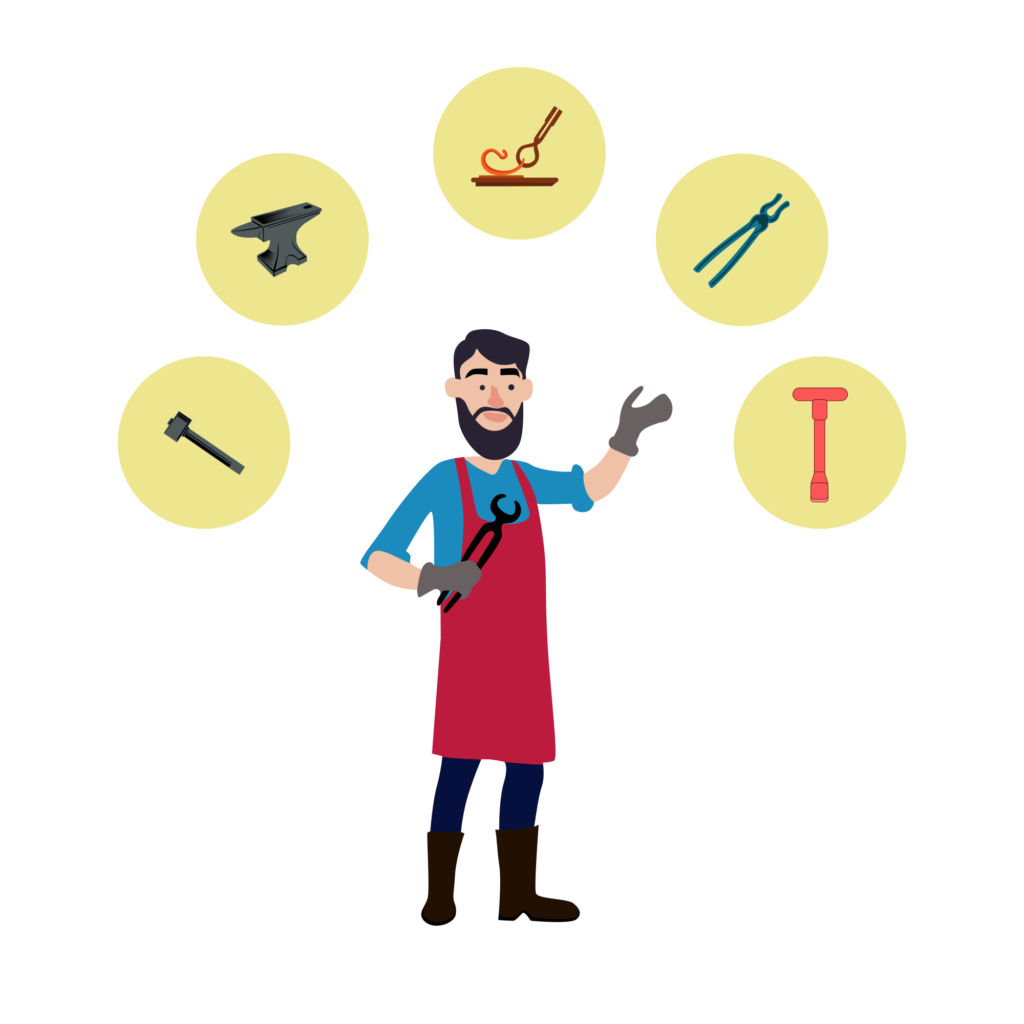
Essentials Tools
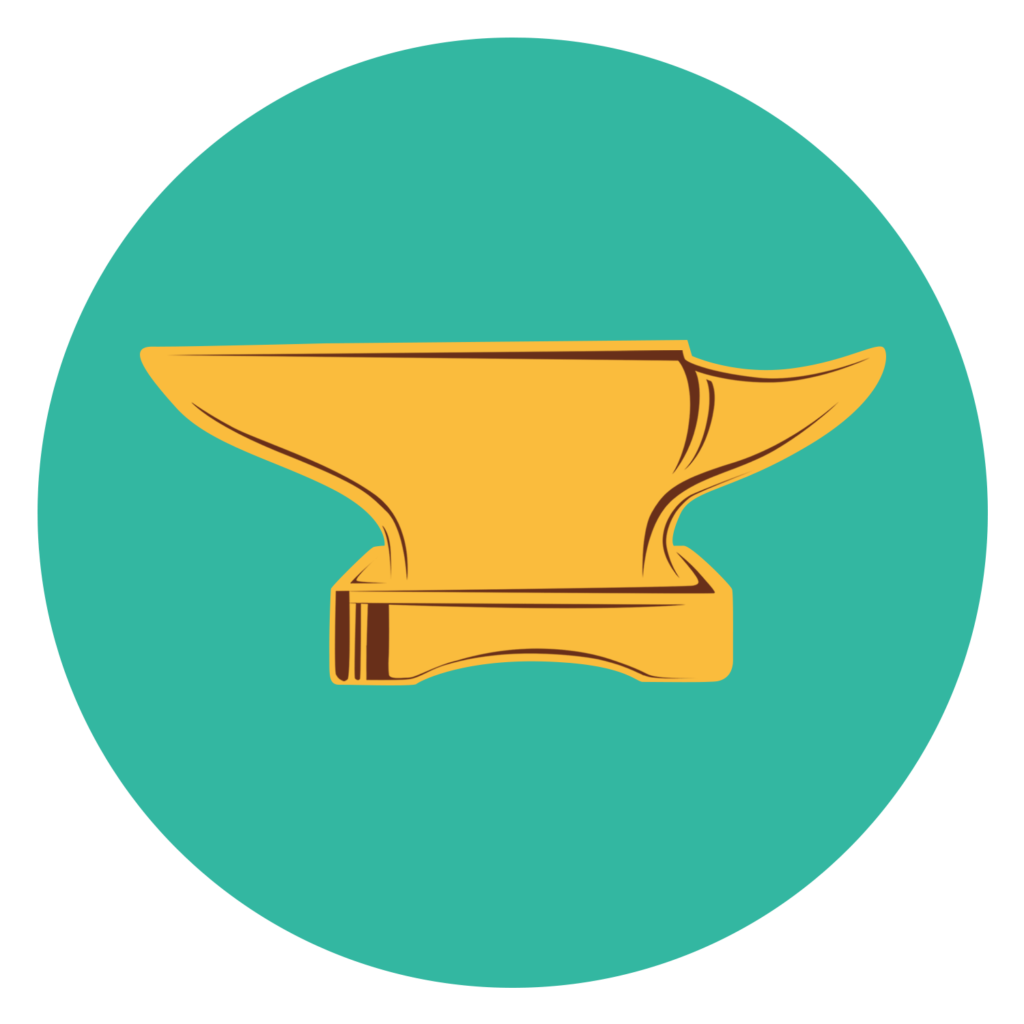
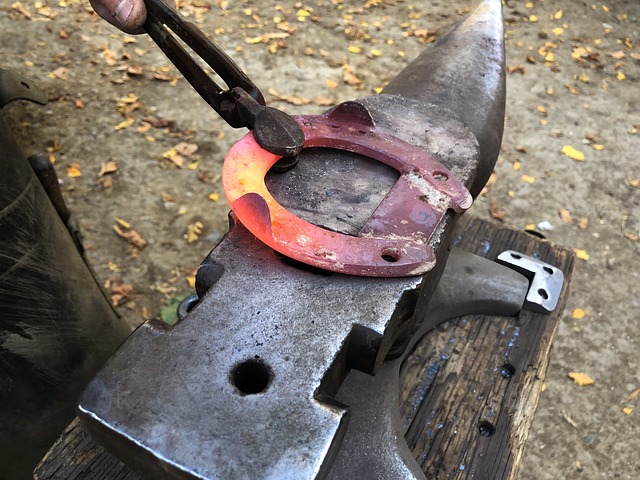
Anvil
An anvil is one of the most fundamental blacksmithing tools. Majority of blacksmithing processes involve beating of metals on an anvil.
It is commonly a sturdy block with a flat surface. An anvil provides you with a sturdy surface where you can mold and beat almost all your metalwork into shape.
You can invest in an old, traditional anvil if you cannot afford a new one. Investing in a good quality anvil will pay off in the long run.
It will enable you to work more efficiently and minimize the risk of injury to the joints in your shoulders, elbows, and hands. A good anvil has a flat steel surface, and an excellent rebound.
Anvils come in various shapes and sizes. Anvils force the energy from the hammer’s blow back to the bottom of the iron you are working on.
This technique means that you will be getting double the work for your efforts. Cool, right? A good anvil can elevate the vibe in your blacksmithing adventure.
Anvils work better when they are big enough to stand solidly on the floor or are mounted on solid surfaces.
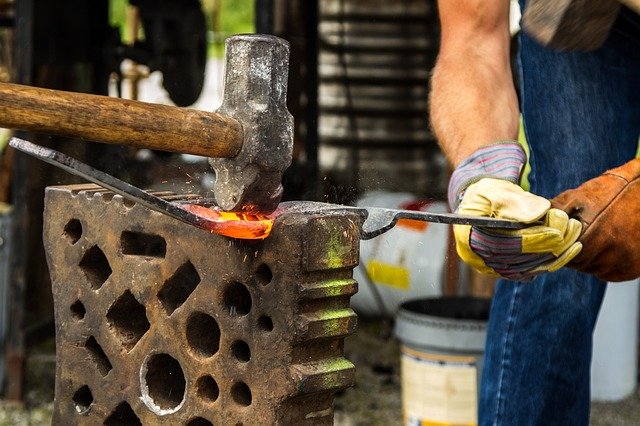
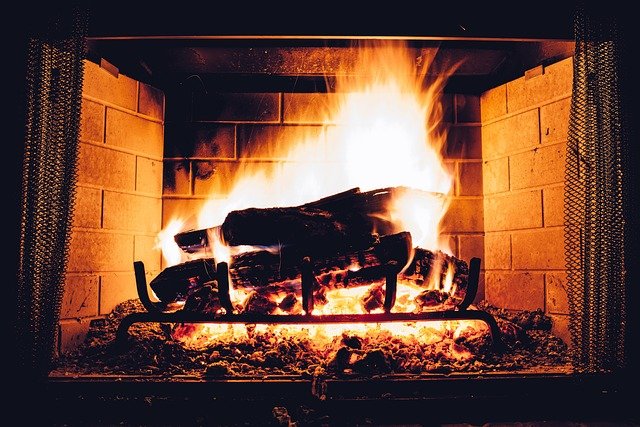
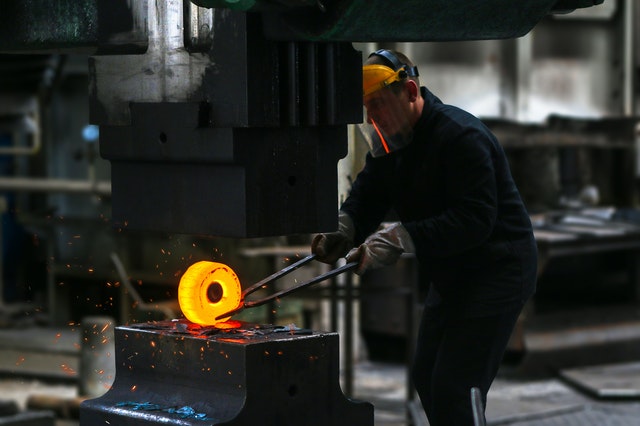
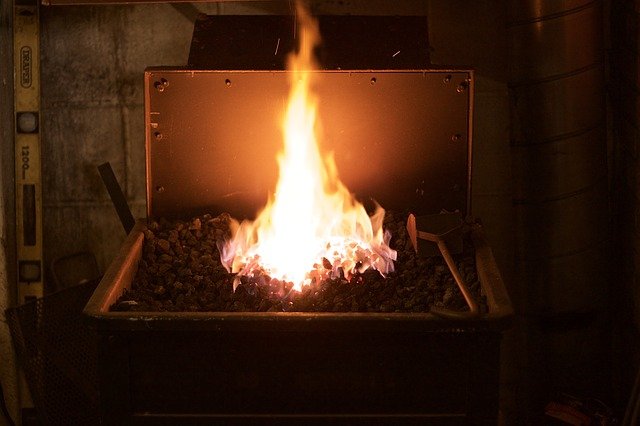
Forge
A forge is a fireplace where you heat your work and it is one of the tools you cannot do without in your blacksmithing guide. Firing and heating metal is a fundamental blacksmithing process.
A forge is vital because it is difficult to beat cold metal into shape. Therefore, it is crucial to heat the metal to a workable temperature to make the metal malleable.
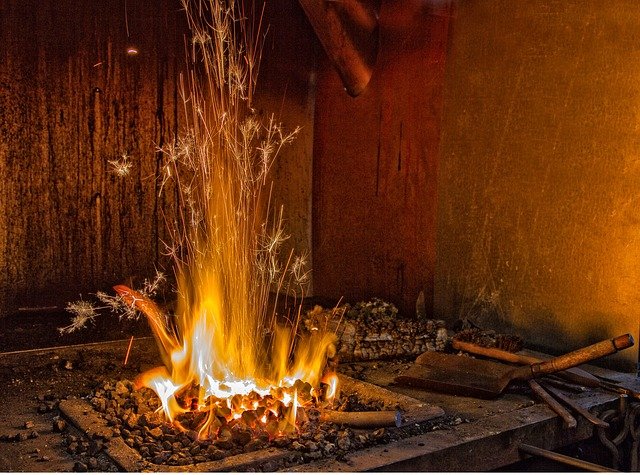
This process is essential, as most of your work will require heating. You can buy a forge or make your own if you are on a budget when you have acquired the necessary skills.
Just like an anvil, forges also come in various sizes and shapes. But there are two basic types of forges: the solid fuel forge and the non-solid fuel forge.
The first thing you should decide is which type of fuel you want for your forge. This cost of acquiring different types of fuel also varies.
So, while considering the cost of purchasing a forge, you should also consider the cost of fueling it. Conventional forge fuel includes coal and propane.
Similarly, you should only purchase a forge that you can control.
Chisel & Punch
A chisel is primarily used when slitting metal. To create a slit, the chisel’s blade is positioned on the intended part of the metal that is to be slit, and then a hammer is used to create the slit.
The punch looks similar to a chisel, and a beginner might mistake a punch for a chisel, but one notable difference is the punch’s pointy face.
This point is useful to create holes in metal. This is done by placing the punch’s pointed face on a hot piece of metal and then striking the back end of the punch with a hammer until the hole is made.
The smith must make sure that the punch does not become overheated by dipping it in cool water after every other strike. Overheating can dull the pointed face.
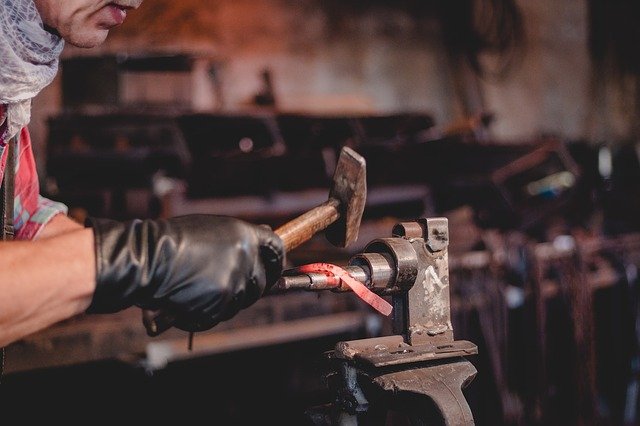
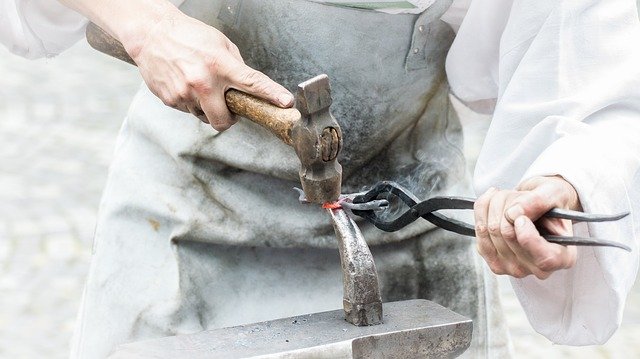
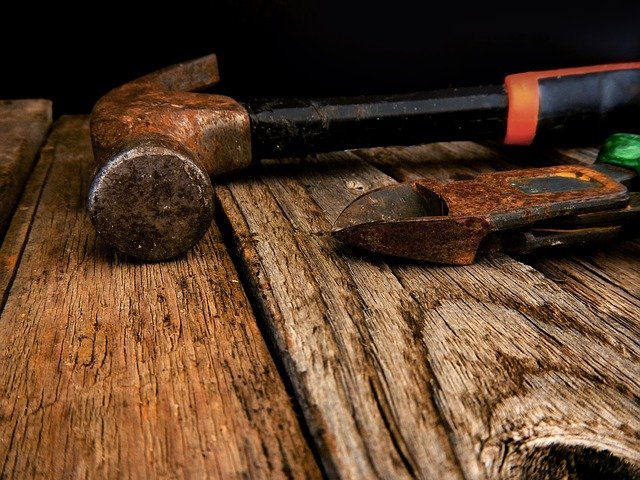
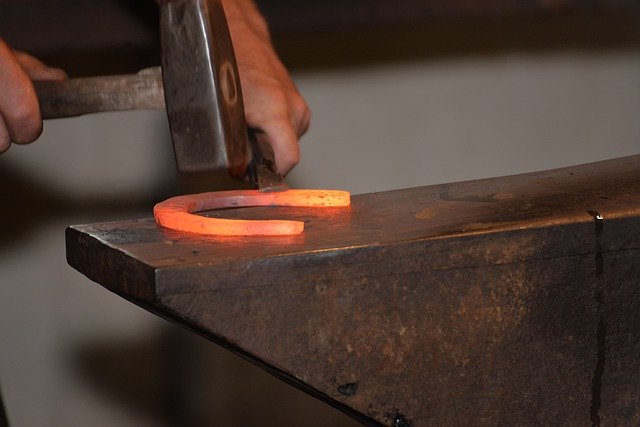
Hammers
Hammer and anvil are like a ring on the finger because they complement each other. A hammer is a tool that you employ to strike metals on top of anvils.
Hammers come in various types, sizes, weights, and shapes, but the one blacksmith most commonly use is the Cross-Pein hammer. It is effective in moving the metal in a direction vertical to the hammer.
There is also the rounding hammer, which is used to pound steel or iron into shape. The shapes and types of hammerhead will affect its functions, and the specific strikes it can make. Every type of hammer is useful as you journey through the proper blacksmithing guide.
This type of hammer is commonly used by many blacksmiths for different processes. It might not be possible to purchase each type of hammer before getting started.
It is best to purchase multipurpose hammers rather than buying single purpose hammers.
There are different types of hammers, and each of them performs specific functions. Here are the most commonly used;
Cross peen hammer
Most people refer to this hammer as the forging or blacksmithing hammer because blacksmiths use it the most. This hammer got its name from the cross peen that opposes the striking face of the hammer.
The peen is perpendicular to the handle and can be flat, rounded, sharp, textured, or smooth.
Straight peen hammer
The straight peen hammer is similar to the cross peen, only that the peen in the straight peen hammer is parallel to the handle. It is also a useful tool for blacksmiths and other fields.
The French and Swedish pattern hammers
This hammer type is a common type of hammer used by blacksmiths. They got their name from the part of the world they originated from.
It is fairly famous among blacksmiths and other professions.
Rounding hammers
Rounding hammers have become more popular in the blacksmith profession in these recent days. They are useful in drawing out metals faster than flat face hammers and also shaping metals.
Some people prefer to use the rounding hammer to cross and straight peen hammers.
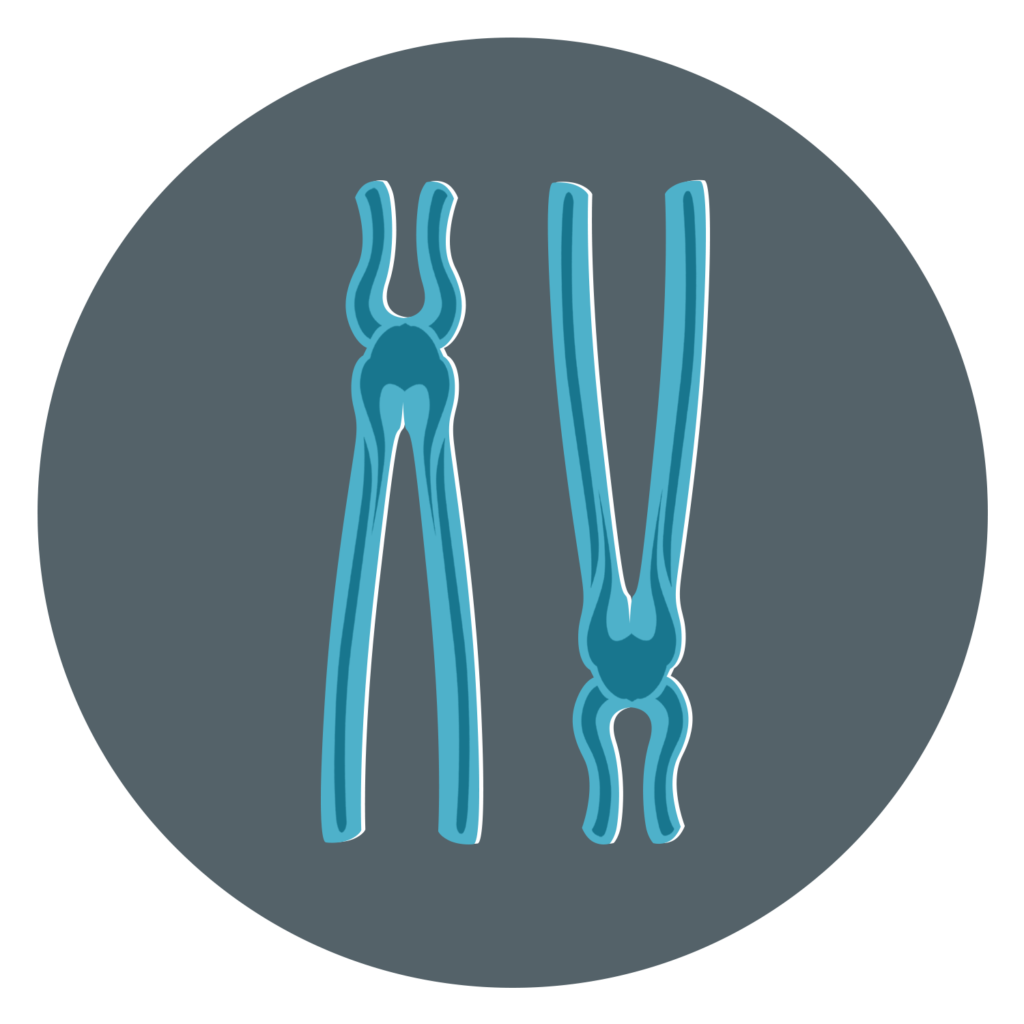
Tongs
At some point in the blacksmithing process, you will need to make use of tongs. The need for tongs is inevitable because you cannot possibly hold hot metals with bare hands.
Normal safety gloves don’t give enough protection. Tongs, clamps and vises come in different shapes and sizes and hold the hot metal.
It is important for the tong you buy to be big or medium-sized. This type will serve you better than a smaller one. As a beginner, you can consider buying the ½ inch bolt tongs.
You can use this tong type for almost everything. As you progress in your blacksmithing journey, you will also learn how to forge tongs.
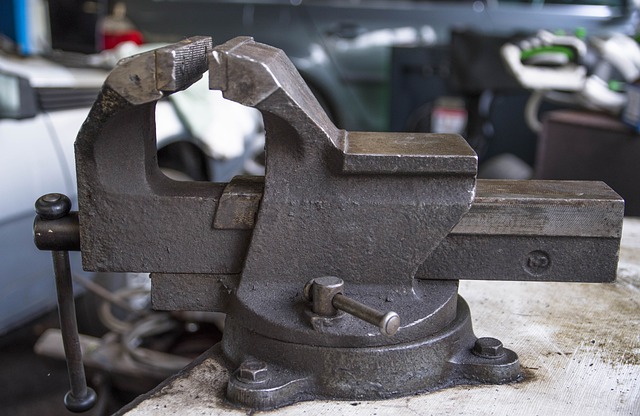
Vises
A vise is an essential tool that helps to hold materials during hammering, twisting, or chiseling. The tool forms a major part of technique learning in the blacksmithing guide. It has adjustable jaws that can tightly hold materials of varying sizes.
A vise has two parallel jaws that grip materials. One of the jaws is fixed, while the other one is moveable.
Aside from the tools above, there are some other supporting tools. These tools are equally important for various blacksmithing processes.
These other tools include; Twisting tools
Slitters
Drifts
Fullers
Swages
Summary
Tools are an essential part of the blacksmithing trade and keeping up with accurate blacksmithing guide. You cannot kick off your blacksmithing journey without some of these tools.
You can start with your master’s tool if you are an apprentice, but it might not work for long. Getting your personal tools will facilitate your learning and metal forging for beginner processes.
It is not compulsory to buy all the tools at a time because it might be too expensive. You can get it one at a time, starting with the essential ones.
Alternatively, you can go for a fairly used product if you cannot afford a new one. With time, you will also get to learn how to make these tools.
CHAPTER 4:
Blacksmith Safety Guidelines
Safety is one of the essential parts of any craft. While learning about the blacksmithing trade and following the blacksmithing guide, it is essential to learn about safety as well.
Remember that blacksmiths are always working with fire and heavy tools. Therefore, it is essential to ensure your safety and everyone’s safety close to your blacksmithing space.
Accidents in the blacksmithing process can be fatal. With blacksmiths, prevention is better than cure.
Essential Safety Tips In Blacksmithing
Safety is an important consideration in the blacksmithing craft. Majority of blacksmithing tasks involve working with extremely hot metals that could cause accidents.
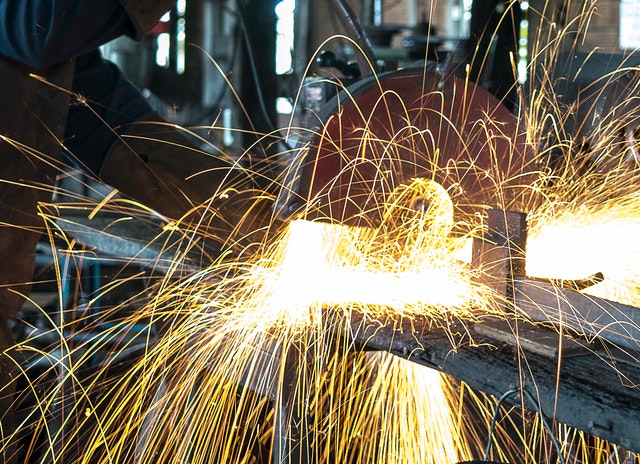
Other than scalding hot metals, hammering is an essential technique in blacksmithing that results in the production of hot sparks. Burns are a major concern in blacksmithing.
The variation in burn accidents range from mild to chronic. Other than skin burns, hot sparks produced during hammering can cause damage to the eyes.
As a blacksmith, there are other hazardous situations you need to know. For example, fossil fuels can lead to carbon monoxide poisoning, which can ultimately lead to death.
Some injuries come from repeating the same movement repeatedly, especially when your technique is wrong. The need to observe specific safety measures cannot be overemphasized.
Here are some safety measures to keep in mind. They might save a life someday:
Careful Handling of Forge Metals
Every metal in the forge should be handled with caution. This treatment is essential because certain metals, such as steel, can be warm enough to harm you even when they’re not glowing red.
Extra care when handling metals in your forge is imperative. Avoid looking directly into the burning fire in the forge, especially when you are not wearing your safety glasses.
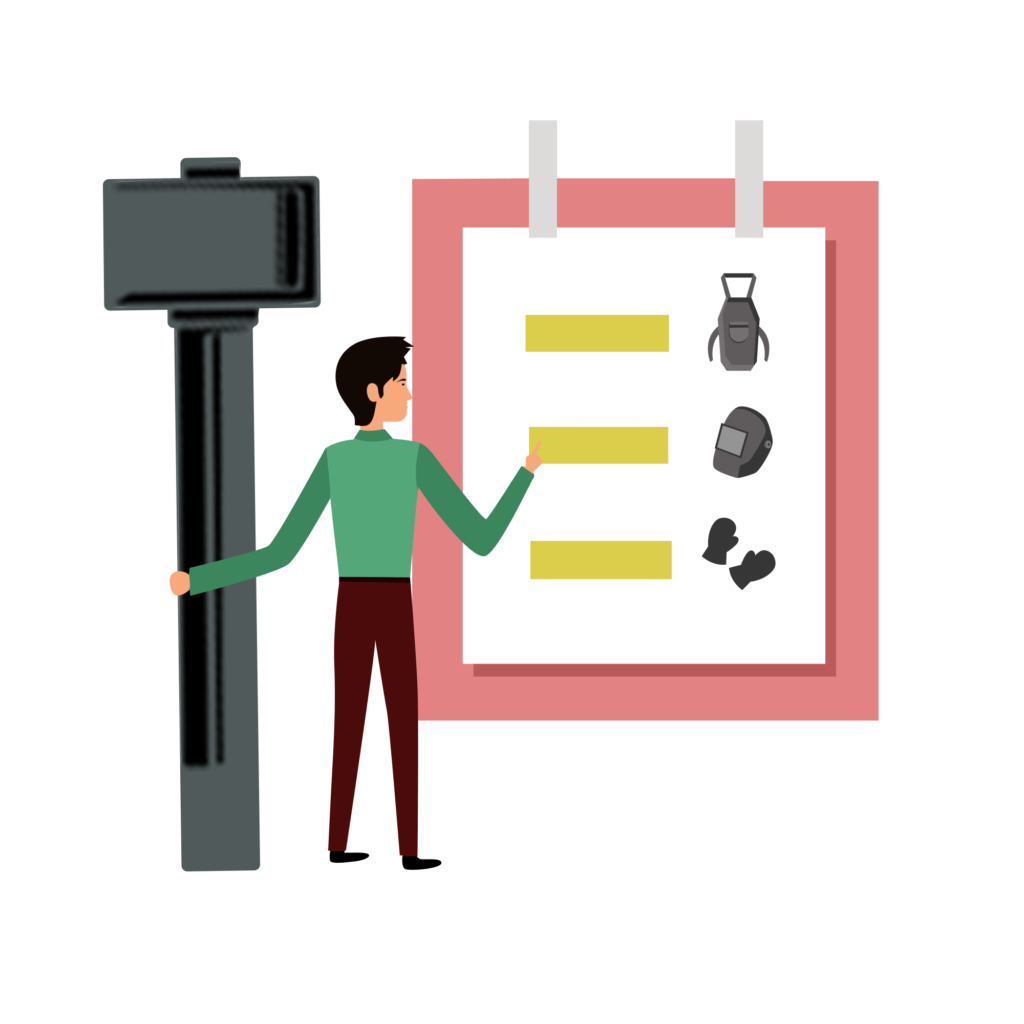
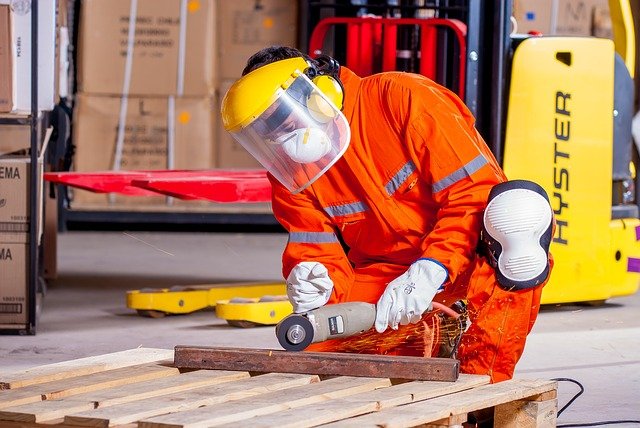
Use of Safety Glasses and Protective Clothing
During forging, hammering, and many other practice steps in this blacksmithing guide, having safety glasses on is a no-brainer. You need them to protect your eyes from hot sparks.
Protective clothing is essential, especially with the production of hot flashes during hammering. Also, wearing a mask on while forging is important to protect your sinus airways from fine ash and black soot.
Use of Ear Protection Devices
Hearing protection is extremely important. Hammering can generate a lot of noise, especially when beating the metal on an anvil.
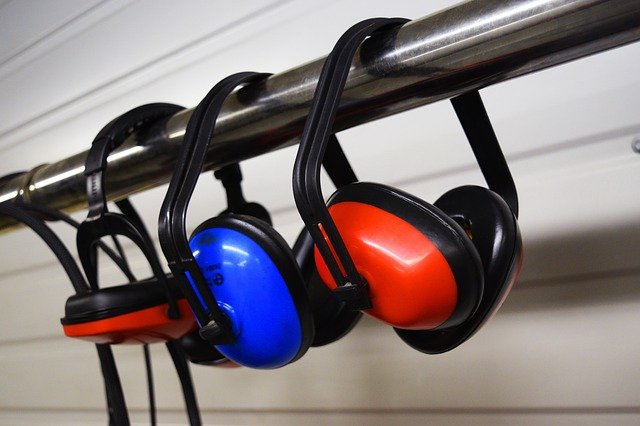
All these noises from hammering can easily damage your hearing. Always remember to use earplugs and minimize the noise emitted by any possible means.
Proper Hammering Technique
Hammering technique is a major part of blacksmithing guide. Repetitively swinging a hammer can cause serious injuries. As a blacksmith, it is very important to be aware of the proper hammering technique.
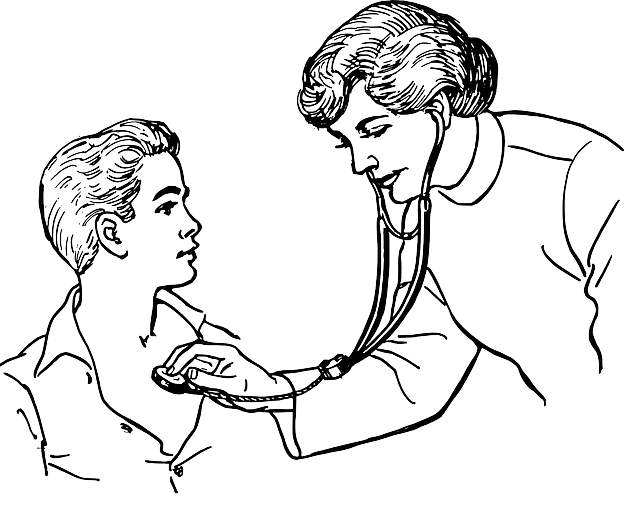
Report Unusual Pains to the Doctor
Any abnormal pains in your hands, elbows, or shoulder should be reported to your doctor immediately. It’s also a good idea to pause once in a while, stretch out, change positions, and do something different.
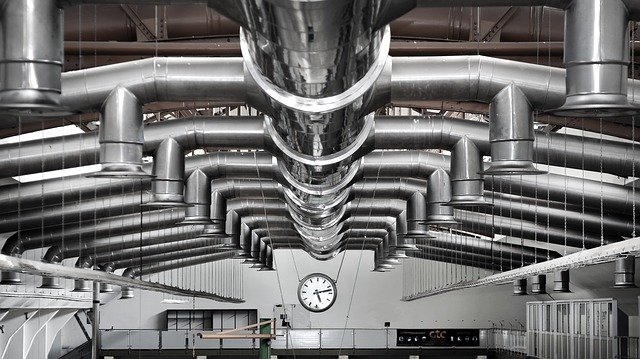
Use of Proper Ventilation Setup
Proper ventilation is also crucial. Whatever fuel is being used, there is a risk of generating carbon monoxide and other toxic gases poisonous.
Proper ventilation will see to the regulation and the purity of air in your blacksmithing workshop. You can get adequate ventilation naturally by using spacious windows.
Ensure Full Activeness and Take Breaks
Take occasional breaks and change positions frequently. It is also advisable to go to a cold room for brief breaks.
Ensure that you are only working in the blacksmithing shop when you are fully active, and you can give it your full concentration. Avoid working when you are exhausted, sick, or when you find it hard to concentrate.
First-Aid Kit Availability
After ensuring that all safety measures have been taken, you should always have it at the back of your mind that a career in blacksmithing comes with minor cuts, scratches, etc.
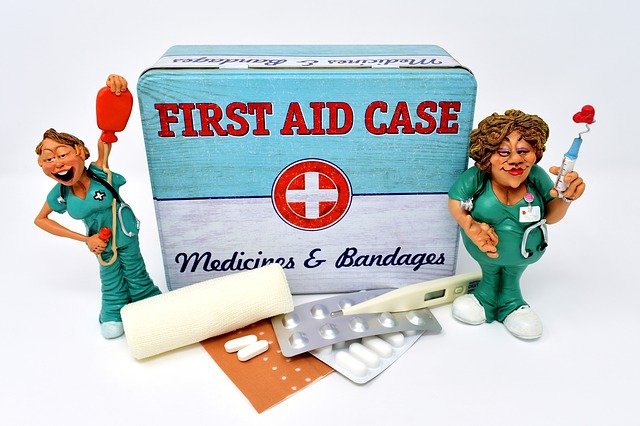
You should have first aid kit with proper injury and cut remedies, ice packs for burns, and salted water for heat stress. This first aid kit will provide you fast relief when you get minor injuries in the blacksmithing workshop and through the blacksmithing guide.
Inclusion of Structural Safety Measures
While choosing or designing the layout for your blacksmithing workshop, ensure that you have safety in mind. Put all structural safety measures in place.
Structural safety measures include having emergency exit doors, providing proper workshop arrangement, positioning your forge far from flammable materials, and having fire management techniques, like fire extinguishers.
This list could go on and on, and while some of these are extremely important, every individual blacksmith knows what safety measures work best for him or her.
Additionally, regular visit to the doctor will go a long way in ensuring a balanced health status and maintenance of physical fitness.
Blacksmithing Safety Precautions
Let’s take a moment before we go into forging and hammering. Your safety and the safety of everyone around your blacksmithing workshop are of paramount importance.
It is best to know the safety procedures that are essential while working in the blacksmithing workshop. You need to know the hazards that are attached to the tools used in blacksmithing.
Blacksmiths work with heavy and sharp objects, including various tools and metals. They also work with fire, which poses another risk. A lot of smoke and particles can also fly around the workshop. It is critical to identify these hazards and protect yourself against them.
Safety Tools in Blacksmithing
Just like many other professions, your health is important to consider in blacksmithing. It would be best to make provisions for preventive safety measures, first aid, and an incidence control plan.
The blacksmithing profession has some basic safety accessories and tools discussed in the latter part of this post. Safety accessories should protect your eyes, ears, skin, and other vital parts of the body.

You can make provisions for first aid in case of an accident in the blacksmithing workshop, you should also include some safety measures in planning the layout of your blacksmithing workshop.
You might want to buy many more tools, or those other smiths might encourage you to buy, but you most likely will not need them to start.
Also, you might need them for advanced blacksmithing later in your career, but you can do without them as a beginner. What you need depends on what types of jobs you will most likely be doing and the blacksmithing career path you intend to follow.
A blacksmith workshop should have certain equipment and devices to keep the blacksmith and anyone else in the shop safe during hazardous projects. Some of these equipment and devices are listed below.
Hand Glove
As much as every other part of your body, your hand needs protection. You have to protect your hand with the appropriate material.
Using gloves is not considered a safety measure among some blacksmiths, but others disagree. When working with metals, it is essential to wear hand gloves.

The gloves will protect your palms from skin peel and callouses. When doing other work types, it is advisable to wear hand gloves, but it isn’t mandatory.
The necessity of wearing gloves depends mainly on the kind of work or materials you are working with. Your palm still has a long way to go with this blacksmithing guide.
Respirator
A blacksmith needs a respirator. This is so important because whenever you are working, there are harmful gases that can affect your health.
Respirators help filter the toxic pollutants from the good air. Proper ventilation, like a chimney, should be in the workshop.

Still, not all of the gas will be eliminated by this method, so a respirator is advised to filter the remaining pollutants from the air in the room.
Anyone with respiratory problems, like asthma or heart problems, should not use a respirator because it can cause lung stress and heart issues.
Earplugs
The sound of metal hammering or other conventional sounds in the workshop can reach up to 80dB, leading to a progressive type of hearing loss.
Using earplugs isn’t very comfortable, but using them is better than losing your hearing. It also protects ears from other hazards.
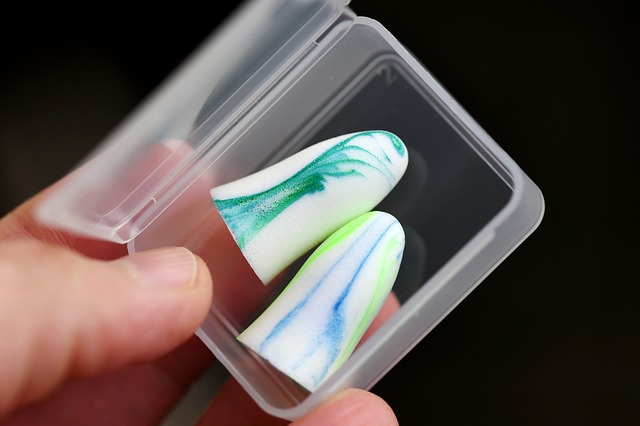
It’s better to be safe than sorry, and making use of earplugs is better than making use of a hearing aid. If wearing general earplugs makes you uncomfortable, you can try other types of earplugs.
They are cheap, so you can try different ones and choose the one that best suits you. Earplugs can offer a great deal of help in protecting your ears, so you should ensure you use earplugs whenever you are working.
Cotton or Fiber Clothing
Synthetic cloth made from polyester isn’t a good clothing to wear in a blacksmithing workshop. This is because clothes made from polyester or other synthetic materials can melt and stick to the skin during work, especially when subjected to high temperatures over a long period.
Fabric at these temperatures can cause burns and scars. It won’t be an enjoyable experience.
Cotton might not seem to be the type of cloth you should use, and you might be skeptical about similar, natural alternatives’ ability to provide safety.
But you would be surprised how much protection clothes made from cotton and wool fiber can offer.
You should wear jeans trousers with cloth made from cotton or other natural fibers. You could also wear a flannel jacket.
Also, make sure not to wear loose clothing, as it could get tangled with your equipment or catch fire due to molten materials.
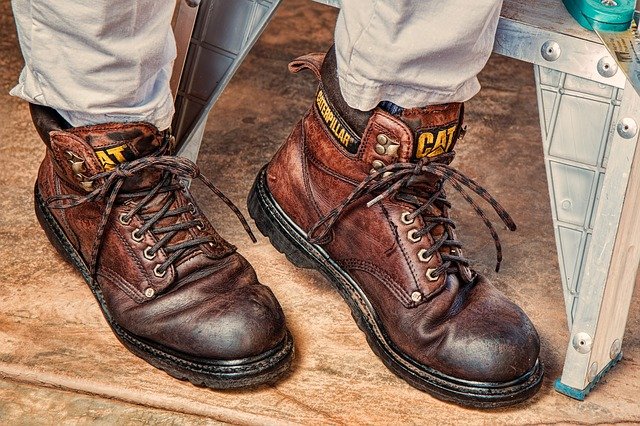
Safety Boots
Safety boots are usually vital for the protection of the feet. You will need it a lot through this blacksmithing guide. Hot or heavy objects can accidentally fall on the feet of a blacksmith.
Hence, the protective boots will protect the leg and limit the extent of the damage. It will also minimize the degree of impact if you accidentally step on sharp or hot metals.
Apron
Apron usually protects the frontal part of the body from the chest down to the knee. It also protects your regular clothes by absorbing all the dirt.
Likewise, you should avoid the use of synthetic aprons. The use of natural apron materials like wool and cotton is more appropriate.
First Aid Kits
First aid kits contain medical elements that can serve as a first care provider in case of an accident. It can serve as the first point of contact and mitigate the extent of damage in an accident.
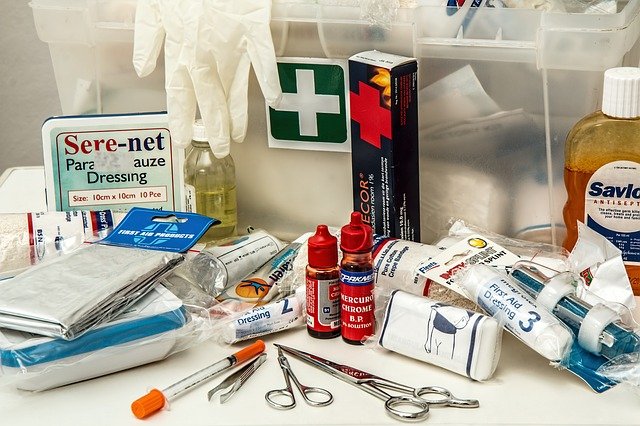
It can contain some wound dressing materials such as bandages, cotton wood, scissors, methylated spirit, and pain relief medications.
Fire Extinguishers

Fire extinguishers are essential in case of fire outbreaks. Having a fire extinguisher around will help you mitigate damage and the spread of fire.
If you cannot afford big or multiple fire extinguishers, you can get a bucket filled with fine sand as a backup. But is advisable to have at least one fire extinguisher in your workshop.
Summary
Safety is a core practice in the blacksmithing profession. It is very essential to know these practices especially as a beginner all through your blacksmithing guide.
The list of safety guidelines to follow is endless but some are of high value. Protecting your body from the hazards of blacksmithing processes should come first.
It is equally important to have some equipment available in your workshop to further ensure your safety. These safety tips will ensure your general healthiness and help in the mitigation of blacksmithing accidents.
CHAPTER 5:
Basic Blacksmithing Processes (The Blacksmithing Guide)
There are a lot of skills you must learn as a beginner blacksmith. The combination of these processes will help you get through most blacksmithing tasks.
You might find the processes difficult if you don’t understand the theoretical basis. A clear understanding of the theoretical part will ease the practical process.
Below is a clear description of some basic blacksmithing processes.
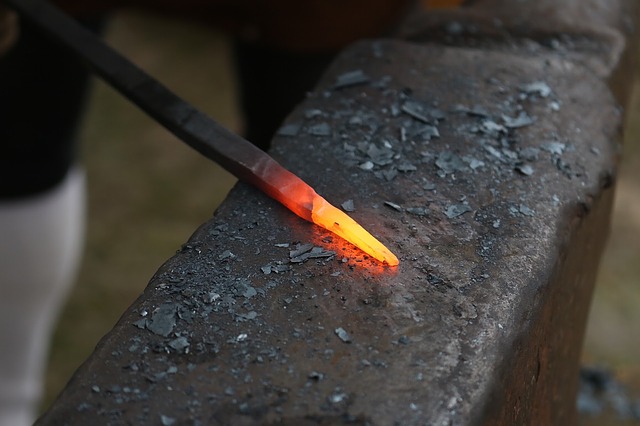
Drawing for Increasing Metal Length
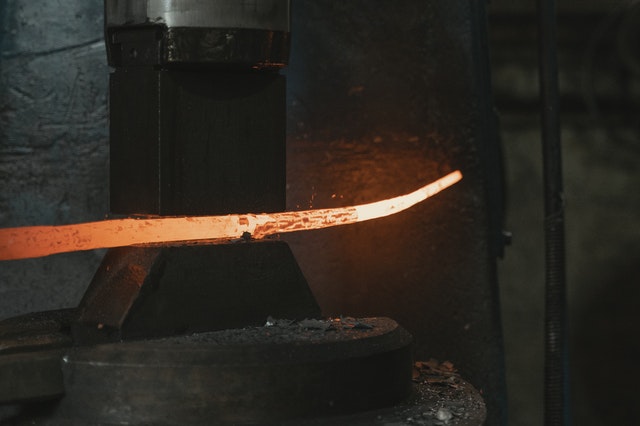
Drawing is a basic blacksmithing operation that lengthens a metal by reducing one or both of its dimensions. It requires a blacksmith to reduce the depth or narrow the width; then, the length will increase.
Drawing out a metal rod does not necessarily mean the rod will be uniform, but the length has to increase.
How to Draw Out Your Metal
Learning how to carry out these techniques is a major part of blacksmithing guide. There are two major methods of drawing out metals; using a hammer and an anvil, and using a fuller. It’s easier and faster to use the fuller method than using the hammer and anvil method.
Although the hammer and anvil method gives you more control over your piece than the fuller method, the fuller method gives you ease.
1st Method To Draw Out Your Metal
The hammer and anvil method requires you to heat the metal as you will need to beat the metal with your hammer on an anvil. It is possible to draw out your metal without heating it, but it will take more time as it is difficult to beat cold metals.
The first step to take is to place the metal in a forge and heat it till it becomes red hot.
Remove the metal from the forge and place it on the anvil. When placing the metal on the anvil, you have to place it on the horn or edge. It will help you have quick, easy, and uniform lengthening.
Place the hot metal on the horn or edge of the anvil and beat it with your hammer. Use the hammer’s round head when drawing the metal, as it will have more effect than using the flathead.
You also have to rotate the metal when beating, such that you do not heat a part of the metal twice before heating other parts.
As you beat the metal, you will discover the length increasing and one or both other dimensions reducing. If you beat the metal uniformly, there is a high chance you will have a uniform drawing of your metal.
2nd Method To Draw Out Your Metal
The second method requires a fuller instrument with a rounded, cylindrical, or parabolic nose and handle referred to as the upper and lower fuller.
You put the lower fuller in an anvil’s hardy hole, and note that the upper fuller has no place in the anvil. The fuller is useful in spreading metals.
It’s faster and easier to use the fuller to spread the metal than the hammer’s flat face. The upper fuller comes in ‘cross’ and ‘straight’ varieties, depending on the task you want to complete.
The fuller will ensure an increase in your metal length and an increase in the width if you do not keep it in check.
To make drawing faster with a fuller, you have to heat the metal. Place the metal on the lower fuller while you strike the upper fuller against it with a hammer.
The upper and lower fuller action on the hot metal makes it extend in length and width, according to how you want it.
Upsetting Techniques for Thickening Metal
Upsetting is quite the opposite of drawing as it requires making metal thicker by reducing its dimensions. This blacksmithing process involves the simultaneous shortening and widening of the dimensions of the metal.
Unlike drawing, where the metal becomes thinner and longer when beating, upsetting makes it shorter and thicker as you beat the metal.
How to Upset your Metal
There are two approaches to upsetting metals. These two methods require you to heat the metal but different places to beat.
One requires you to beat the hot part, while the other requires you to beat the cold part. Whatever the approach, you can be sure to get a thicker and shorter version of the metal.
1st Method To Upset Your Metal
To perform the first method, you have to heat the metal in a forge till it becomes red hot. After heating, you have to retrieve it from the forge using crucibles or tongs to prevent your hands from burning.
Place the hot metal on an anvil and beat the end of the metal with a hammer.
When beating the metal, you should hit it with the hammer, following the length so that the length reduces.
Let’s take a metal block with the length running from point A to point B, width running from point C to D, and height running from point E to F. If you want to hit the metal in upsetting, you have to hit it from point A or B.
This way, it will seem as though you converted the length to the height. As you heat the metal, you will have to check the width to have uniform thickening. You can also thicken the metal part with localizing heating, but this is best done with the second method.
2nd Method To Upset Your Metal
The second method requires you to heat only a part of the metal. You can also heat part of the metal for the first method, but localized heating is typical of this approach.
To use this approach, you have to heat part of the metal in a forge (the part you want to thicken).
After heating the part to your desired state, you should retrieve it from the forge and place it on an anvil, just like the first method. You will place it vertically where the cold part will be up, and the hot part is against the anvil.
You will beat the cold part with a hammer, and as you do so, the hot part thickens. This part might seem like a hassle in forging for beginners.
This method is useful in thickening a part of the metal while the other parts remain unaffected. When using either of the upsetting approaches, you also have to be cautious if you want to have uniform thickening.
You can beat the side of the metal to distribute the thickness to the required area.
Hammering Techniques
If you do not have the right hammering techniques, you might find it hard to use a hammer in blacksmithing. Before you can be good with using a hammer, you have to know the types of hammers and their uses.
If you do not know the function of each hammer, you might never have a good technique.
Types of Hammer
There are different types of hammers and you will learn about them in this blacksmithing guide. There are various types of hammers used in blacksmithing, but here are the most commonly used;
- Cross peen hammer
- Straight peen hammer
- The French and Swedish pattern hammers
- Rounding hammers
Hammering Techniques Used in Blacksmithing
Knowing the hammer types and their uses will allow you to apply some hammering techniques in blacksmithing. The main uses of hammers in blacksmith are lengthening, curving, chasing, and flanging.
Here are simple techniques used;
Lengthening
Lengthening requires little technique as it only deals with elongating or increasing the length of a piece. When the hammer hits the metal, whether cold or hot, it yields by shifting mass to the sides, rear or front.
The temperature just determines how fast the metal will yield to your hammering.
When the blacksmith beat metals with the peen, they yield to the rear and front, increasing the length. Continuous beating of the metal on both sides will cause an increase in the length of the metal.
Using this technique will only increase the length of the piece to the front and rear.
Another technique of lengthening is using the face of the hammer on both sides of the piece. Unlike the first technique, using the hammer’s face will cause the metal to yield on all sides.
So when you are using the hammer’s face, the material will yield to the front and the sides, causing it to widen and increase in length.
The continuous action of the hammer on the metal will lead to its continual lengthening. High temperature also constitutes the factors that affect the rate at which the workpiece yields. The higher the temperature, the faster the lengthening process.
Curving
Curving requires you to lengthen only a side of the metal in such a way that it gives a two-dimensional curved shape. You can either use the peen of a hammer or the face of the curving hammer.
Curving techniques are a bit similar to lengthening techniques and they are cores of basic blacksmithing guide.

When using the peen of a hammer, you only have to beat the metal on one side. The metal yields to the rear and front and automatically curves upward.
It happens because the metal does not gain length on both sides, making one side shorter than the other.
When using the curving hammer, you also have to beat only one side of the metal. The continuous action of the hammer on the metal will cause the length to increase on one side.
The metal curves as you hit it with the hammer. To make carving easier, you should curve your piece when it is hot.
Chasing
Chasing refers to the three-dimensional shaping of metal. It requires using a hammer to beat the metal into a circular shape. Steady and continuous hammer blows make the metal yield in all directions in a curving manner.
Chasing is typical curving in all directions.
The first technique is to use the flat hammer support method. You have to place the metal on a flat hammer and hit it from the center with a chasing hammer.
As you hit the workpiece in a spiral direction, it yields in every direction, causing it to curve upwards.
You also have to be careful with the hammer blows so they don’t reach the border. Many blows will also make the blows thinner and harder in the middle. And it can cause it to tear easily.
Another technique is to use the hollow hammering support method. To use this approach, you will need to get a cylindrical structure with hollows.
You will place the metal on the hollow and then offer it steady hammer blows.
As you land the blows on the metal, it starts gaining its curved shape. Hammer blows in a spiral manner will also ensure uniform curving in the metal.
Make sure the blows only reach the center at the end of your chasing.
Flanging
Flanging is the process of curving the borders of a material with a hammer. This process does not require much technique as you only have to bend the edges of the metal with a hammer.
You have to place the piece on a solid structure before hitting it.
For circular pieces, you will have to get a smaller cylindrical structure. Place it on it and then bend the edges of the metal sheet.
Make use of a hammer you can handle as it will give you much control when bending it. You can place it on the edge of an anvil and hit it with a hammer for other shapes.
The shape it takes depends on how well you curve it. It also depends on your skills in blacksmithing.
Bending
Bending is a blacksmith operation that requires the use of tools on metals to reshape it into desired angles. You can bend your metals by placing them over the edge of an anvil or its horn.
After placing it, you heat it with your hammer to your desired shape. You can also use your hammer and other tools to bend your metals, just like in flanging, curving, and chasing.
You can bend some metals by first heating them up in a forge while you cannot heat others as they lose their tensile strength on heating. Different metals require different methods of bending.
You can also bend metal by inserting the bending fork into the hardy hole of the anvil. You will then place the metal between the lines of the bending fork.
You can then bend the material to the angle you want. You can also dress widen or tighten bends by beating them with a hammer against the anvil’s appropriate part.
Shrinking
Shrinking is similar to upsetting but has a different operational technique. It is also useful in thickening materials and flattening waves.
The major difference between upsetting and shrinking is that upsetting is for metals with a straight shape while shrinking is for those with the compound curve (metals in the shape of a bowl).
When a metal has a compound curve, it develops waves and ripples due to its length being forced into a smaller radius.
By compressing the waves, the metal becomes thicker, and the length reduces. It evens out the ripples and makes your workpiece appear smooth.
To shrink your metal, you will place it against the flat head of your anvil and then beat it with the flat head of your hammer. It works best when the object’s radius matches the radius of the hammer’s flathead and the anvil.
You will get to shrink your piece faster when it is hot than when it is cold.
Punching
The punching process defines cutting through a piece to make a hole or to create a decorative pattern. Punching is essential in blacksmithing as it is useful in several processes like the making of hammerheads, where you will have to make a hole to fix the handle, etc.
The blacksmith makes this hole with the punch.
The punch is a metallic blacksmith instrument with a sharp tip and a blunt end used to make holes and perform other punching activities.
Punching does not only include making holes; it also includes drifting, cutting, and slitting. It is best to heat the metal you want to punch before you start punching.
After heating the workpiece, you should retrieve it from the forge and place it in the anvil’s appropriate section. Place your punch on the part you want to work on and hit it with a hammer.
Whatever you do with the punch depends on what design or hole you want to make.
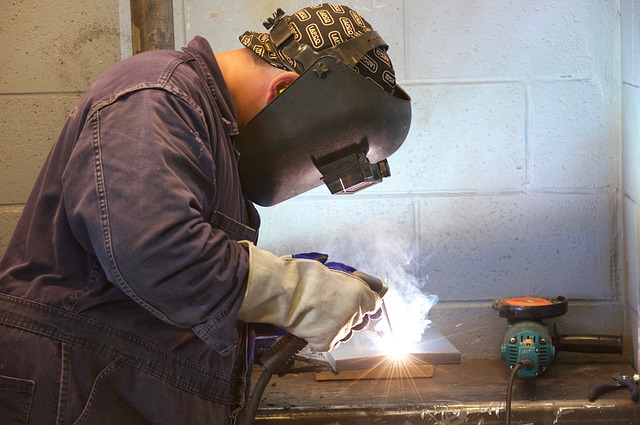
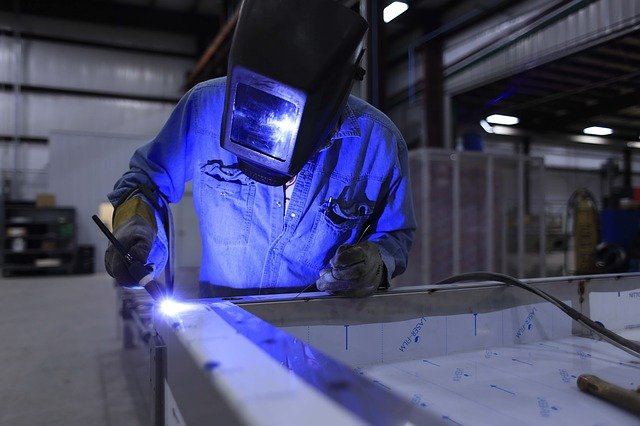
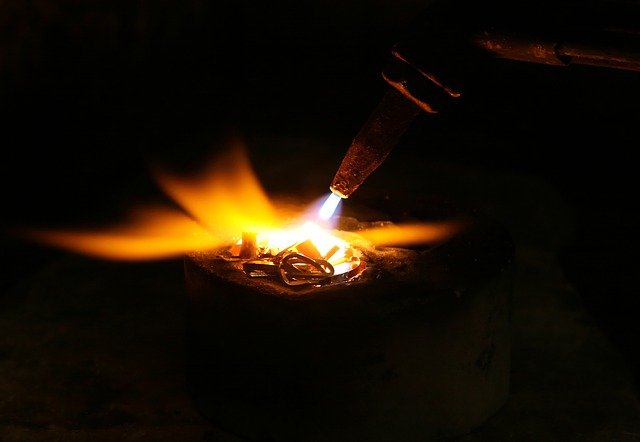
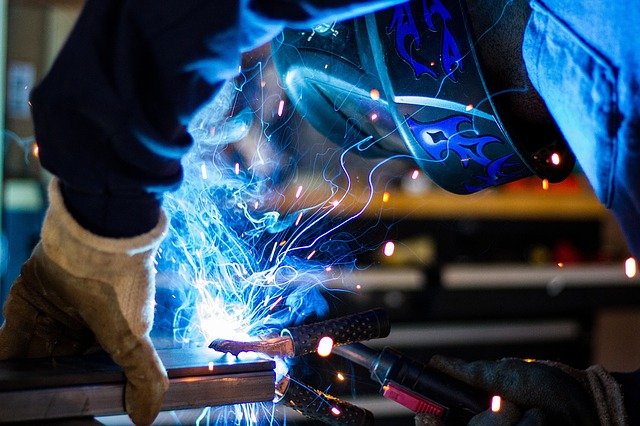
Welding
Welding is a blacksmithing process whereby blacksmiths join similar or different metals together. Welding requires heat made from different sources to melt and join the metals together. You cannot skip this vital step of the blacksmithing guide.
There are two types of welding; arc welding and gas welding.
Arc welding is a type of welding that requires electricity to create enough heat to melt the metals. After melting the metals, it joins them together with the same heat.
This type of welding requires a large amount of heat created from large electrical energy.
Gas welding is also a type of welding that requires large heat to melt and join metals together. But this welding type does not use electricity; it uses oxyacetylene gas to make flames that will heat the metals.
Gas welding involves the cutting and welding of metals using gas fuels.
Riveting
Riveting is a blacksmithing technique used to hold metals together. You will need a rivet if you want to perform riveting on your metals.
A rivet is bolt-like equipment with two heads for joining metals together.
When riveting, the blacksmith makes a hole in each metal with a punch. He makes the hole in such a way that the two metals align.
He then inserts the rivet into the hole and beats it to form the head. The rivet holds the metals together, and the blacksmith can decide to use more than one rivet.
Hardening
Hardening, also called quenching, is a blacksmithing process that makes the metal become harder and stronger. It requires the gradual cooling of the metal after heating.
This process helps eliminate distortion, cracks, and air trapped in the metal, making it stronger.
To harden your metal, you place it in a forge for heating. After the metal becomes red hot, you should retrieve it from the forge and dip it gradually in water.
Allow it to cool before you remove it. You can add salt band oil to the water to reduce the rate of cooling.
Tempering
Tempering is also a blacksmithing process that makes the metal stronger and harder. It requires skill with temperature to harden the metal.
It is mostly useful in hardening metals that need to withstand heavy striking.
When tempering, the blacksmith polishes the metal till it shines. The polished metal is now heated slowly to increase the durability of the metal.
As the heat gets to the metal’s surface, it displays different colors that signify its strength. You can also repeat this process to increase the strength of the metal.
Finishing
Finishing is the blacksmithing process that helps make your work look good. As the name implies, it is always the last process to carry out during blacksmithing processes.
Finishing helps your workpiece look good and smooth, resistant to corrosion, and increases its longevity. There are several surface finishing methods in blacksmithing, but only a few are practical.
Most blacksmiths make use of a few finishing methods, leaving the rest to fantasy. Here are some of the finishing methods for blacksmith processes.
Black Oxide
Black oxide is an industrial finishing method that offers a thin coating to the workpiece. The coating does not affect the work done on the metal but offers protection against oxidation.
It is also suitable for home use and might be good protection against corrosion.
Boiled Linseed Oil
Boiled linseed oil is a useful finishing that prevents rust and is mostly suitable for non-food grade items because of its subtle dark finish.
It also has a water-resistant coating formation that helps keep corrosion away. It is a better version of the raw linseed oil, dries faster, and helps fill cracks.
Boiled Linseed Oil with Turpentine
The mixture of boiled linseed oil and turpentine gives your work a glossy finish. The method is suitable and provides outstanding antique objects.
It also protects your workpiece from corrosion and rusting.
Beeswax
Beeswax serves as a natural remedy or alternative to other chemical-based finishing methods. This finishing method is suitable for utensils and food-grade items as it is not toxic and comes with a pleasant fragrance.
You have to apply the wax for the finishing, but you have to apply it on a clean and rust-free workpiece.
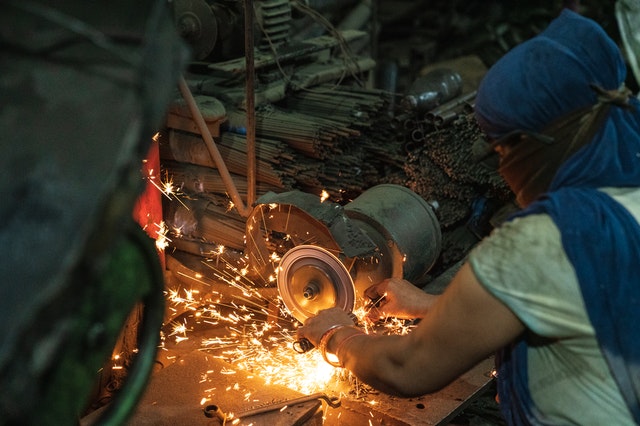
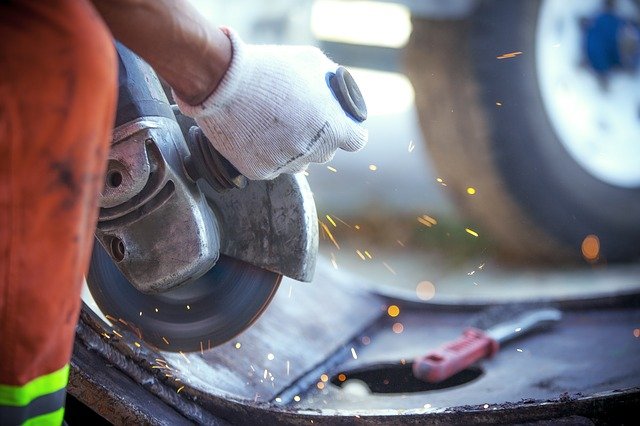
Grinding
Grinding is a blacksmithing or manufacturing process that includes providing finishing and accurate dimensions to tools and objects. When grinding a metal, you tend to rough out part of its mass to get your desired finished result.
Grinding is a sub-set of cutting as its process includes cutting out metals. Grinding has been an aging time-consuming blacksmithing process that became easier with modernization.
You can grind your workpiece using different tools that include grindstones, bench grinders, sandpaper, angle grinders, die grinders, grinding machines, etc. These tools are useful in grinding other metals requiring similar techniques with a slight difference. You will learn more about it in this blacksmithing guide.
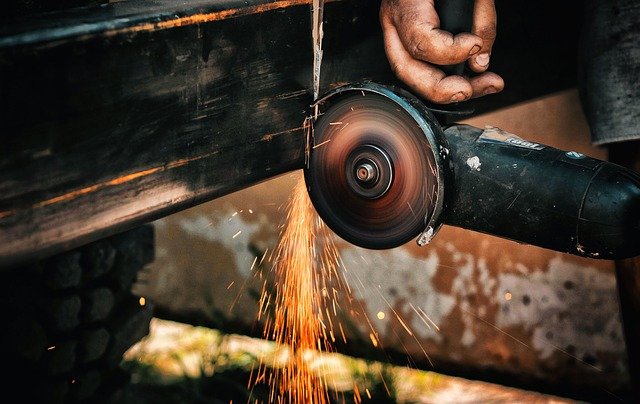
Grinding typically involves rubbing your rough workpiece against a solid rough substance.
It is either you move your piece against the grinding tool (like in grindstones), or you move the grinding tool against your piece (like in sandpapers). Either way, you get a ground finishing that makes your metal look smooth.
There are also mechanical grinding tools that require less stress as they get powered by electricity. You only have to hold the workpiece against them while the grinding occurs.
Whether cutting, making angles or grinding your metals, you have to make sure you provide a top-notch result with your tools.
Heat Treating
Heat treating is a thermal blacksmithing process that requires heat to change the chemical and physical properties of a metal. Heat treating is common in blacksmithing as most of their job processes require heat treating.
Heat can soften metal to improve its formability and make it harder to improve its strength.
To perform heat treating, you will have to heat the metal to the required temperature. The temperature can be as high as 2400 degrees Fahrenheit and can be as low as -120 degrees Fahrenheit or lower.
The type of heat treating determines the temperature you heat the metal.
After heating to your desired temperature, you have to hold the temperature for a while. Some heat treating will need you to hold for about 60 seconds, while some might require you to hold for over 60 hours; different heat treating with different time requirements.
After holding, you should retrieve and cool in quenching liquid.
The quenching liquid you can use include oils, water, brine, molten salts, polymer solutions, and gases. Whatever method of quenching you use should suit the job you want to complete.
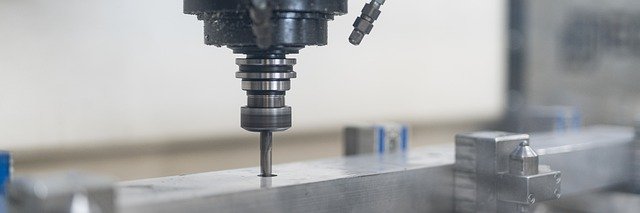
Drilling
Drilling is a cutting blacksmithing process that requires a drill bit to cut holes into metals. The drill bit is mostly a rotary tool and usually multi-point with powerful drilling abilities.
You can use either power the drill bit manually or with a machine; the machine’s use is more common.
The machine causes the drill bit to rotate at great speed, forcing the rotary drill bit to press against the workpiece, shove away some mass, and drill your needed hole.
The use of a drill is quite simple as it only needs you to apply pressure on the machine against the piece and get your hole drilled. Like a drill press, some machines do not need you to apply pressure as they will drill the piece successfully.
Drilling manually will require you to make use of the drill bit and other tools. You might need a hammer to hit the bit into the workpiece and a clamp to drive it in well.
You can also use the clamp to remove it when required.
Forge Welding
Forge welding is a welding process used to join two or more metals and beat them together with a hammer. The process consists of heating and forcing the metals on each other at high temperatures.
You can also make use of other means to create the force other than hammers.
When forge welding, you have to heat the two metals to a very high temperature. Sometimes, it is better to heat the metals to a nearly molten state.
After heating the metals, you should retrieve them from the forge and place them on the anvil for the hammer’s action.
Place the metals on each other the way you want them joined and hammer them together. You can also reheat the metals if they are becoming cold.
Forge welding requires skill, patience, professionalism, and most importantly, the right tools.
Summary
Blacksmithing skills and techniques are not processes a beginner can learn overnight. It requires regular and constant practice with an ideal blacksmithing guide.
There are many blacksmithing techniques and processes but a fair number of them have been mentioned and discussed in this chapter. Knowing the theoretical basis of these processes will further ease their execution whenever you are ready to carry them out.
CHAPTER 6:
Setting up A Blacksmithing Shop (A Stepwise Blacksmithing Guide)
The more you advance in your blacksmithing training, the more you feel the need to set up your blacksmith shop. It is one of the biggest steps in the blacksmithing profession.
Like co-operate businesses that use office, your shop is your official point of contact as a blacksmith. It doesn’t have to be an official space; you can start from your home yard or garden.

Reasons Why You Need a Blacksmithing Workshop
Are you wondering why you need a shop? Here are a few reasons why having your blacksmith shop is crucial.
- A good blacksmith shop will help you to be more professional and organized.
- A blacksmith shop provides you with a space that acts as your official contact point with clients and potential clients.
- It enhances the blacksmithing processes to be relatively more comfortable and smoother.
- It offers a convenient space where you can exhibit your skills, keep your tools, and organize your products.
- A suitable blacksmith shop will create the right work environment even for individuals that intend to learn.
Step By Step Guide to Setting up Your Blacksmithing Shop
Setting up your blacksmith shop requires cautious and precise steps. It is more like a dream transformed into reality.
This step-by-step guide will help you through the process of setting up your shop regardless of your location and available space.
STEP 1: Know What You Want
Knowing what you want is creating a mental picture of how you want the shop to be. This step forms an essential part of blacksmithing guide and it will help you estimate the cost and everything you need to consider before taking other steps.
However, it is essential to consider every necessary factor at this point. Consider the available space, cost relative to your budget, how soon you want to get it done, etc.
There is always a possible layout for every space. You can consult a more experienced blacksmith to help you through this phase.
Once you know what you want, the next step to actualize these plans.
STEP 2: Get a Space
Getting a suitable space should come next. It will help you through the entire blacksmithing guide. The size of space you get will be a major determinant of a lot of other things.
The amount of space you have will determine the design and layout. It can also determine the cost of setting it up.
If you are lucky enough, you can get a space that will accommodate all your designs and configurations. If the reverse is the case, you might just have to manage whatever space you have.
STEP 3: Figure out The Layout
The layout of your blacksmithing shop is crucial for smooth operation. It is also vital for effective space management.
The layout includes the design and construction. Here are some of the essential construction considerations for blacksmithing shops
Doors
You should ensure that your entry’s size is big enough for a smooth movement of tools and materials in and out. It should also be spacious enough to avoid clumsiness.
It is also good to have two doors for emergencies and to allow seamless access to the workshop’s front and backspace. You can make one of the doors an emergency exit while the other will be for regular movement.
Ceiling
Aside from the type of roof you want to use, another factor to consider in your layout is the ceiling’s height. The best height range of the ceiling is between 8.5-10 feet.

The height of the roof will make it easier to get rid of the heat from the forge. Likewise, it will mitigate the possibility of fire catching the ceiling.
Lightning and Ventilation
Lightning and ventilation can go hand in hand if you consider making use of natural ventilation and natural lighting. You should include a sizable window that will allow enough air and natural light.
The natural light will help you to get a clear vision. Proper ventilation will also prevent suffocation.
Having windows is not enough. The windows should be located at strategic points to allow proper ventilation.
Your main door can even serve as an additional source of ventilation and lighting.
Arrangement
The arrangement of the blacksmith shop is essential for smooth operation. The proper arrangement will also mitigate accidents and clumsiness.
However, if you want to ensure proper arrangement in your workshop, you must keep certain things in mind. For instance, you should situate your forge somewhere far away from the wooden components of the shop.
Keep fire response materials at strategic points within the workshop to ensure your safety and the safety of others. These materials can include fire extinguishers, quenching water, and a bucket of sand.
Also, you should have a strategic and specific point where you keep your tools and materials. Avoid using it to liter your workshop.
If your blacksmith shop’s wiring is inevitable, it is vital to ensure that all the cables have proper insulators around them. Naked wires can accidentally contact one another to cause a spark that can lead to a fire outbreak.
Buildup Materials
The buildup materials of your blacksmith forge must be of high quality. Avoid using substandard materials that will deteriorate in a short while.
The wooden materials should be able to withstand adverse conditions, including the heat from your workshop. It is essential to give other materials similar consideration.
Also, importantly, ensure that none of your buildup materials are highly flammable.
STEP 4: Get Your Tools
Once you have a suitable layout for your shop, proceed to get the basic tools you need. These tools are essential for you to get started with blacksmithing guide.
If you cannot afford all the tools at once, you can always get them one at a time, starting with the essential ones. Likewise, if new tools are too cost-intensive for you, consider going for fairly used ones.
With time, you will get to know how to forge various tools, and you won’t have to buy them. Once you get these tools, ensure that you properly arrange them in your workshop.
Inspect the tools to ensure that they are neither damaged nor malfunctioning. Using damaged tools might be costly and dangerous.
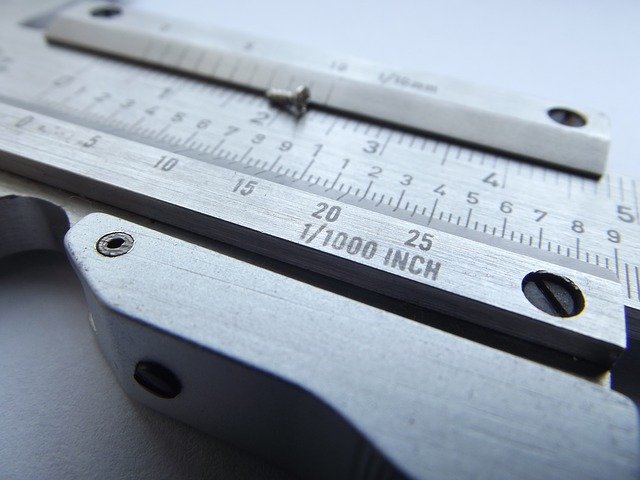
The basic tools you need to kick-start your shop include tongs, forge, hammers, anvil, vise, chisel, and measuring materials.
STEP 5: Finishing
If you have done a perfect job with the other steps above, the finishing should not be a problem. All you need to do is to inspect the shop and ensure there are no lapses.
As much as you are considering the design, it is vital to keep your safety in mind. With all these in place, you are good to go!
Summary
It is the dream of every blacksmith to own their space after successful training and mastering the blacksmithing guide. The good news is that setting up a blacksmith shop is not as complicated as it seems.
As long as you have a suitable space and figure out a suitable layout, you are halfway there. Getting your tools and other arrangements can then follow.
Remember to keep safety in mind while setting up the workshop. Likewise, it is best to cut costs as much as possible without compromising quality.
The land tenure system of your location is also paramount while acquiring space. Some countries require a license before you can set up a blacksmith workshop.
Understand the legal standpoint of your location and comply accordingly!
CHAPTER 7:
Blacksmithing Trade Monetization
Making money is an aspect of blacksmithing a lot of people are curious about. Most apprentice and aspiring blacksmiths can’t wait to get to this point of the blacksmithing guide.
But before you can start making money from the blacksmithing trade, you must ensure that you patiently learn. With the proper knowledge of the craft, you can earn a living for the rest of your life.
Aside from those that only make blacksmithing a hobby and practice at their leisure, every other professional blacksmith wants to make money from the craft.
The good news is that there are several ways to make money from blacksmithing. The better you are with the craft, the more money you can make.
Let’s take a critical look at some of the valuable ways to make money from blacksmithing.

Sale of Blacksmithing Materials
The sale of blacksmithing materials is one of the oldest ways blacksmiths make money. Interestingly, it is still one of the best ways to make money from the blacksmithing craft.
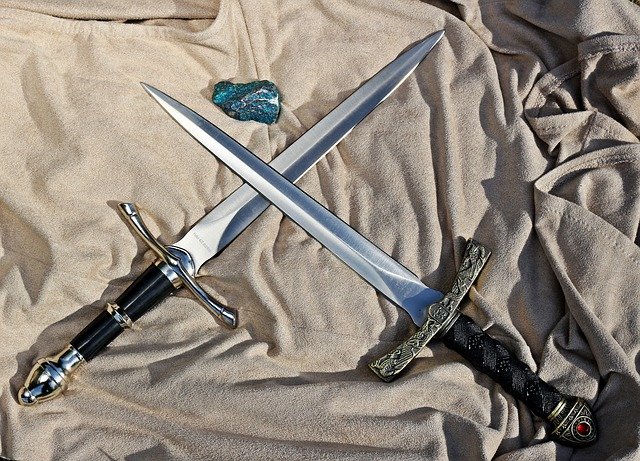
You can forge and sell various materials, including various tools. They can also forge and sell common useful materials like knives, doorknobs, etc.
Aside from selling forged materials, they can sell other products like forge fuels and blacksmithing protective materials. In fact, you can include the sale of various types of metals.
Make Money from Teaching Blacksmithing
Although you must master the craft before making money from teaching blacksmithing, it is one of the best ways to make money.
Interestingly, you can make money from teaching blacksmiths, both online and offline. Offline, you can take as many apprentices as you can accommodate and get them to pay for your services.
Online, you can teach blacksmithing through various channels. One of the common ways is creating a website with valuable content and guides that can aid blacksmiths. You can even create an online blacksmithing guide.
Creating YouTube channels is another profitable way you can make money from blacksmithing online. All you have to do is make short but explanatory videos about various blacksmithing processes.
Similarly, you can write eBooks and hard copy books that are useful for blacksmiths. You can sell these books and make enough money from them.
The better the book’s quality, the higher your chances of making more money.
Forging and Welding
If you don’t have enough resources to make sales materials, you can start by forging and welding. This way involves working on a specific client’s project.
You can work with individual clients or with a company. Creating new materials and repairing existing projects are ways you can make money from forging and welding.
This form also includes working on structural and architectural designs like gates, railings, and cabinets.
Open a Blacksmith Craft Gallery
If you are a fan of art and history, there is a means for you to make money with blacksmithing. Remember that blacksmithing is a craft with a rich history and high artistic value. You can explore this space.
You can make money by opening an art gallery and earn money from visitors and guests. The gallery will have collections of beautiful, unique, and ancient blacksmithing works.
There is an opportunity to make money from ticket sales. You can also put up some of the beautiful arts for sale.
With craft galley, you will make money while also preserving the rich history and core value of blacksmithing
How Much Money Can Blacksmiths Make
Unlike salary earners, blacksmiths do not have a fixed amount they earn. There is no limit to how much money blacksmiths can make, especially if you follow due blacksmithing guide.

As long as you keep building your skills and improving your expertise, the more you increase your potential income. Also, it is safe to say, the harder you work, the more your chances of earning a better income.
Requirements for Becoming A Professional Blacksmith
Many people wrongfully carry the impression that you have to meet specific extreme requirements before you become a professional blacksmith. As much as blacksmithing is not just hitting a piece of metal, there are no high-level standards.
You will make a good blacksmith and reach the professional level in no time if you meet the following requirement;
- Enormous interest in the blacksmithing trade and pleasure in handling various blacksmithing tools.
- Commitment, hard work, and willingness to learn.
- Creativity and prudence.
- Have a general and specialized knowledge of various blacksmithing skills.
- Physical strength, mental focus, and agility.
- Financial intelligence and business and ethics.
- Good hearing and vision.
Education Requirements for Professional Blacksmiths
Unlike many other professions, blacksmithing does not explicitly set any academic standard to become a professional.
Formal education is usually left at the choice of individual blacksmiths as there are no general requirements. You can reach the peak of your blacksmithing career without having a formal education. Just following the basic blacksmithing guide.
Nevertheless, having a degree or other professional qualification is always a plus for blacksmiths. It will even be more relevant if you attend a blacksmithing school or earn a professional certification in a similar field.
Besides the fact that formal education will broaden your knowledge and open your mind, it will also add a lot of respect to your name. You can get blacksmithing courses and certifications in various colleges and universities.
Courses to Consider to get a Formal Education in Blacksmithing
The formal education courses usually come in the form of the blacksmith apprenticeship program. You can also take online courses and certifications if you cannot find colleges or universities that offer such courses in your location.
Finding courses that are specific for blacksmiths can be a little bit difficult. In this case, you can take similar or related courses if you are interested in getting a formal education.
Commonly related courses include welding, metal works, painting, casting, sculpture, and so on.
Overall, as much as formal education is not necessary for blacksmithing, it doesn’t mean getting a formal degree is irrelevant.
Considering the blacksmithing trade’s calculative and business aspect, it is even recommended for blacksmiths to have formal primary education. Basic education includes how to read, write, and carry out simple calculations.
Summary
Making money is crucial, especially if you are a professional. However, you shouldn’t skip any part of the learning process in a rush to make money.
Master the craft, and money will certainly come. Pick a specialty and avoid being a jack of all trade, master of none.
There is no limit to the extent of money you can make if you take your time to master the blacksmithing craft.
CHAPTER 8:
Frequently Asked Questions
As a beginner blacksmith, certain question might cross your mind regarding this profession and blacksmithing guide. Well, look no further.
Here are answers to some commonly asked questions about blacksmithing;

Is blacksmithing dangerous
Blacksmithing comes with its wok hazard, just like most other crafts. Nevertheless, it is easy to say that blacksmithing is one of the most hazardous crafts.
It deals with fire, very hot metals, and repeated heavy hammer blows. It is possible to get scars and burns from these processes quickly.
However, you can mitigate these hazards and dangers by putting some precautionary safety measures in place. Putting on your safety gears (gloves, aprons, etc.), keeping fire extinguishers and first aid kits close to you, as well as ensuring other blacksmith safety measures will ensure your safety.
Is blacksmithing a dying art
Blacksmithing is not a dying art. In fact, blacksmithing relevance continues to become apparent, despite not being one of the most popular crafts.
However, there are some modern upgrades to blacksmithing tools and skills that make them slightly different and more efficient than the medieval blacksmiths.
Is blacksmithing a trade
Of course, blacksmithing is a highly-skilled trade that involves creating artistic, custom, and useful products. These products are sellable, and blacksmiths often make a lot of money from sales.
Blacksmiths can also repair objects, as long as they are made of steel and metals.
Where can I learn blacksmithing
Learning blacksmithing is not a problem as long as you are ready to go through the process. The first thing to do is locate a professional blacksmith workshop close to you and register for an apprenticeship.
You can also help yourself by reading blacksmithing books, watching helpful videos, and trying out various light projects.
Do I need a license to work as a professional blacksmith
The question about needing a license to operate as a professional blacksmith is dependent on your location. Some countries require it while others do not.
It is best to understand the legal demands of the location and obtain a license if necessary.
Do blacksmiths pay taxes
Of course, blacksmiths pay taxes like other legal income earners. Blacksmithing is a legit trade that will require you to pay taxes.
Can you get cheap tools for your blacksmith shop
Yes, it is possible to get cheap tools for your blacksmith shop. You can get fairly used tools if you cannot afford a new one.
Alternatively, you can make some tools for yourself to save you some cost
How long does it take to become a blacksmith master
Learning is a lifelong process, and it continues throughout the entire career. However, once you complete your blacksmithing training, own your own blacksmithing shop, and have 2-5 years of experience under your belt before you qualify for the master rank.
What can I make in a blacksmith workshop
Blacksmith deals with making different objects and materials with metal. You can execute most blacksmith projects in your blacksmith shop.
Some of the things blacksmiths make include armors, weapons, hardware like door handles, various blacksmithing and construction tools, home devices, and other metallic materials.
How much does it cost to set up a blacksmith shop
The cost of setting up a blacksmith workshop varies but does not cost much on average.
You have space and can make some of the tools you need; it is possible to set up a blacksmith shop for $300-$1000. The considerable variation depends on the things you intend to get and the standard you want to set for your shop.
What is the hottest forge
During blacksmithing, there are times where you will need to make use of a very hot forge and times where you will need a moderately hot forge. The propane forge is the hottest type of forge, sweeping past the coal forge with so many degrees Fahrenheit.
The propane forge can get as hot as 2300 degrees Fahrenheit, making it suitable for large-scale manufacturing uses.
How to weld two pieces of metal together
Welding is a forging process that involves fusing materials together. There are several ways to weld two pieces of metal together, including forge welding.
They all use the same necessary process. It involves heating the materials to a workable high temperature and fusing them to form a strong joint.
The fusing often requires hammering to force the materials into bonding firmly together.
How to join two pieces of metal without welding
There are alternative joining techniques aside from welding. Some other ways you can join two pieces of metal without welding include soldering, riveting, spot welding, brazing, bolting, hardware assembly, and the use of glue.
Each of these methods has its unique processes and techniques. However, they can provide the same joining power and result in various types of welding.
How to fuse metal without welding
It is almost impossible to fuse metal without welding. Aside from the methods listed above that are suitable for joining metals, you might not get an alternative to fusing metals.
If you want to combine metals, you will have to heat them to a high temperature and hammer them together. This process is not entirely different from welding.
What is the best metal to forge
There are several metals you can forge, but you should go for the best. The best metal to forge is steel as it is relatively easy to get; it is highly malleable and resistant to heat and corrosion.
The different types of steel you can use range from alloy steel, carbon steel, stainless steel, nickel steel, tool steel, etc. Make sure you select a good choice of steel to forge.
What is the best forge for beginners
Beginners in the blacksmith profession might find it difficult to use some forge for their blacksmithing processes. Although the coal forge is a great forge for blacksmiths, it might pose a lot of difficulty for users, especially beginners.
The propane forge provides easier usage for beginners making it an appropriate type of forge.
The forge is very easy to control and provides the needed heat ranging from low to very high. It might cost more to get, but it sure does provide top-notch efficiency and performance.
How much does it cost to build a forge
The cost of building a forge varies depending on how you want the forge to look. Sophisticated and professional forges require high-quality material, causing them to be more expensive than other forges with little or no sophistication or professional use.
Building a cheap forge can cost as low as about $50, at mid-range of about $400, and a high price of over $1000.
Summary
The answers to some questions highlighted in this chapter takes you a step further in the mastery of the blacksmithing trade. With these questions answered, you can have more confidence in the learning of this craft.
No one knows it all at once but as time goes on, you surely get better in the craft with constant reading and practice.
Conclusion
Getting started with blacksmithing is not a very challenging process. It is even easier if you have a master, appropriate tools, and other resources.
Your journey into the blacksmithing career begins with your interest.
Developing interest in the blacksmithing trade comes before the process of learning itself. You should identify why you want to learn blacksmithing to guide you through the learning, and the process of choosing a blacksmithing career.
The above blacksmithing beginners guide will help you get started with the blacksmithing profession with ease. It will help you identify the necessary tools to begin your blacksmithing trade, and help you understand the basic blacksmithing techniques.
It will also equip you with essential blacksmithing tips that will ensure your safety when executing various blacksmithing tasks and also provide full exposition on how to setup your blacksmithing shop. Another essential inclusion is showing you how to earn a living in this craft.
Summarily, this is all you need to know about how to get started in blacksmithing. Take the first step today and watch yourself progress in this profession.