Ever thought of forming metal into various dimensions and shapes? Forming shapes and angles is one of the major fun projects in the blacksmithing profession. Forging a square corner is an important technique in the forging process.
Although forging corners might not be an independent process, you would certainly need it to forge several other projects. Looking at a square corner from afar makes it appear like a difficult task. However, it is often easier than imagined when you understand the techniques.
If you intend to learn the forging process of a square corner, then you are about to access a priceless piece of information. All you need is rapt attention and your basic blacksmithing skill. Below are a few helpful steps that can serve as a guide on how to forge a square corner.
Instructions on How to Forge A Square Corner
Step 1: Get Your Materials
Getting your materials and tools is the first step. It is an essential step because it goes a long way in determining the result. The proximity of your tools and materials will mitigate the stress involved in carrying out the project.
Step 2: Measurement and Cutting
Most times, when blacksmiths want to forge square corners, they usually forge at a specific length. Therefore, it is important to measure the length of the material before proceeding with the rest of the process.
You can measure and cut out the actual length of material you intend to use from the stock. Also, you should measure the precise length the square corner would be on the material.
Step 3: Heating
Once you have adequately done your measurement, then it’s time to make use of your forge. First off, it is important to be aware that you are not heating the entire stock. The only part you would need to heat is the part that will form the square corner.
To make it easy for you, you can mark the part of the stock where the square corner would be. You should not forget the application of borax or any other suitable flux you intend to use.
Step 4: Form the Angle/Hammering
Forming the angle is the most crucial step in the entire process. This step will determine the way the corner would come out. Therefore, you should be careful with this step.
Once the material reaches the desired temperature, retrieve it from the forge and put your hammer to use.
There are two techniques for forging a square corner at this step. Both techniques are equally easy, and they give the same outcome. You have the liberty of choosing the technique that is most suitable for you.

Technique 1:
- Drive a wedge-shaped slitting tool at about 7/8 inches into the material once it reaches a suitable temperature.
- Cut the material over the edge of your anvil.
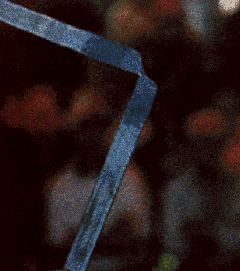
- Gently but precisely bend the square corner area to form a right angle.
- Scarf the edges of the right angle one after the next with the use of a ball-peen hammer.
- Overlap the two scarfs by placing them carefully at 180⁰ over one another in an overlapping manner.
- Gently place the part that forms the edge back into the forge and let it heat gently.
- Start forming the square corner by treating the edge with slight repeated blows from the hammer.
- Keep placing the edge into the forge and hammer down at intervals.
- Once you already have an almost perfect corner, finish the process on the edge of your anvil.
- Keep hammering on the edge of your anvil until you have a perfect corner.
- Reheat the material at intervals as the need arises.

Technique 2:
This second technique is usually more straight-forward than the first. The process starts immediately after your measurement.
- Heat the vicinity that will form the square corner in the forge.
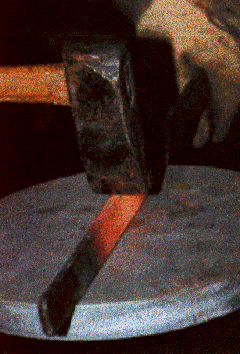
- Stand the stock upright on the anvil and hammer gently downwards. The essence of this slight hammering is for the heated area to start forming the bend.
- Continue the slight hammering until you see a noticeable curve.
- Direct the bend over the edge of the anvil and hammer downwards to start forming the right angle.
- Keep up with the hammering over the edge of the anvil. You can reheat when there is a need for it.
- Use the blows to correct the edge when it starts losing conformation.
- Proceed with the process until you have your desired result.
Step 5: Finish Up
At the end of step 4, you should have your perfect corner already. The finishing you give the rest of the material is dependent on what you intend to create. You can anneal and harden the material to your taste.
FAQs on How to Forge A Square Corner
Question
Can I forge a square corner with steel?
Of course, you can form a square corner with any material. All you need to do is simulate the techniques above. However, you might have to pay special attention to the properties of the material.
These properties include melting point, malleability, and other properties that affect forging. These properties might call for a slight adjustment in applying the techniques above.
Question
How long does it take to forge a square corner?
Forging a square corner is not time-consuming. On average, it only takes about 30 minutes to forge a square corner completely.
Question
At what temperature can I forge a square corner?
The forging temperature for forging a square corner is dependent on the type of material you are using. Its melting point usually determines the forging temperature of the individual material. Therefore, it is crucial to understand the properties of the material you are using before forging.
Video
Warnings and Precautions
- Ensure the use of gloves and other safety gears while carrying out the process.
- Ensure proper ventilation and avoid clumsiness in your workspace.
- Handle materials that have entered the forge with care to avoid burns.
- Hammer gently and be watchful of your finger and palm.


